
DIY Christmas Ornament -Snow Globe Ornament

DIY Christmas Ornament -Snow Globe Ornament
Supplies
- Clear Plastic Fillable Ornaments Ball (the kind that splits in half like this)
- Pencil & Scissors
- Paint & Paint Brushes
- Christmas Ribbon (linked)
- Glitter (lots linked)
- Super Glue (my preferred kind -linked)
- E-6000 (linked)
- Christmas Scrapbook Paper (like these)
- Unfinished Wood Discs & Ovals (here’s a few options but look at Hobby Lobby or Micheals)
- Unfinished Wood Discs Ornamental (like this)
- Christmas 3d stickers or felt stickers (My Snowman is linked- others for sale close to Christmas)
- Small White Styrofoam Balls (linked)
- Fake Snow otherwise called Artificial Plastic Snow (linked)
DIY Christmas Ornament -Snow Globe Ornament -Video
DIY Christmas Ornament -Snow Globe Ornament -Pictures
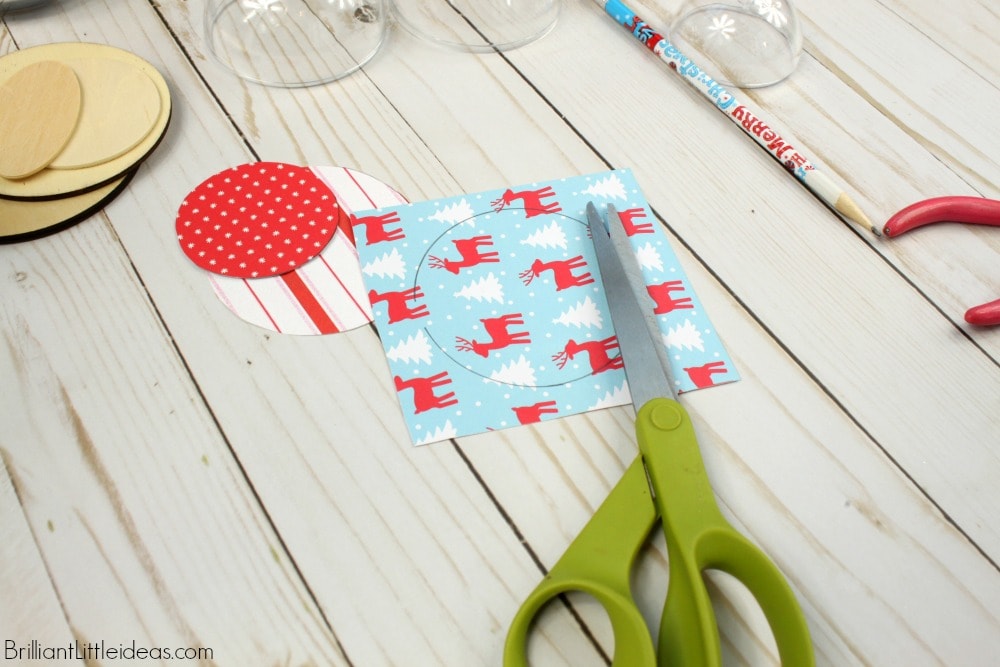
Start out by gathering all of your supplies. The plastic ornaments (linked) need to be pulled apart so go ahead and separate a few of those. Match each half ornament to a wooden disk (linked) because these will become a snow globe in just a bit. Then choose your favorite scrapbook paper as a background, take a pencil and trace around the half ornament.

Cut out each circle you traced on scrapbook paper and find your matching disk and ornament.
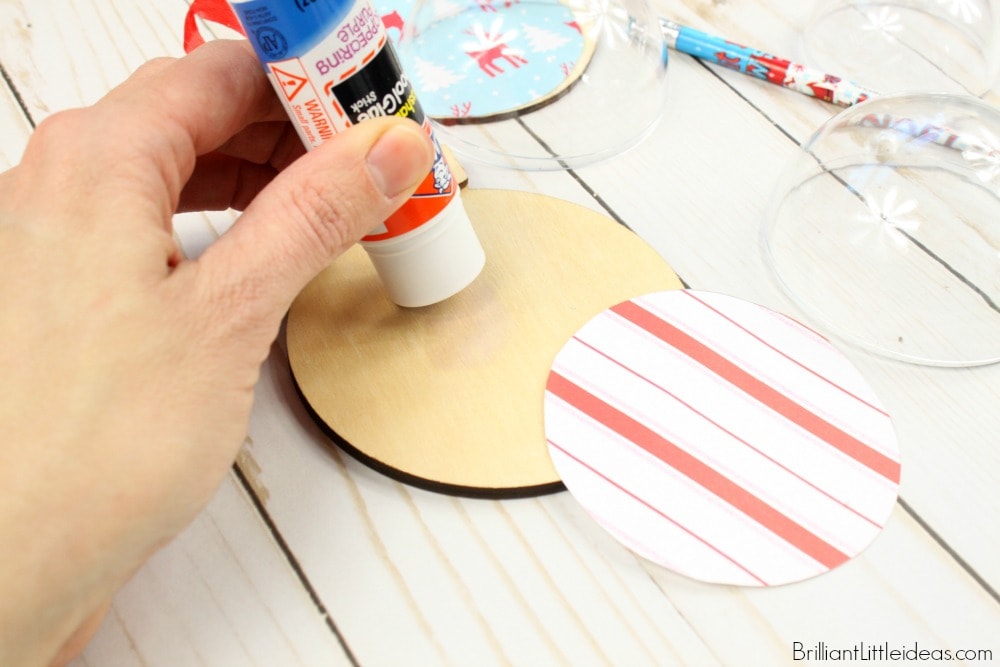
Glue your scrapbook circle onto a matching wooden disk. You can use regular Elmers stick glue for this. Set aside to dry. If you’re wanting these cute ornament shaped wooded disks (click here).
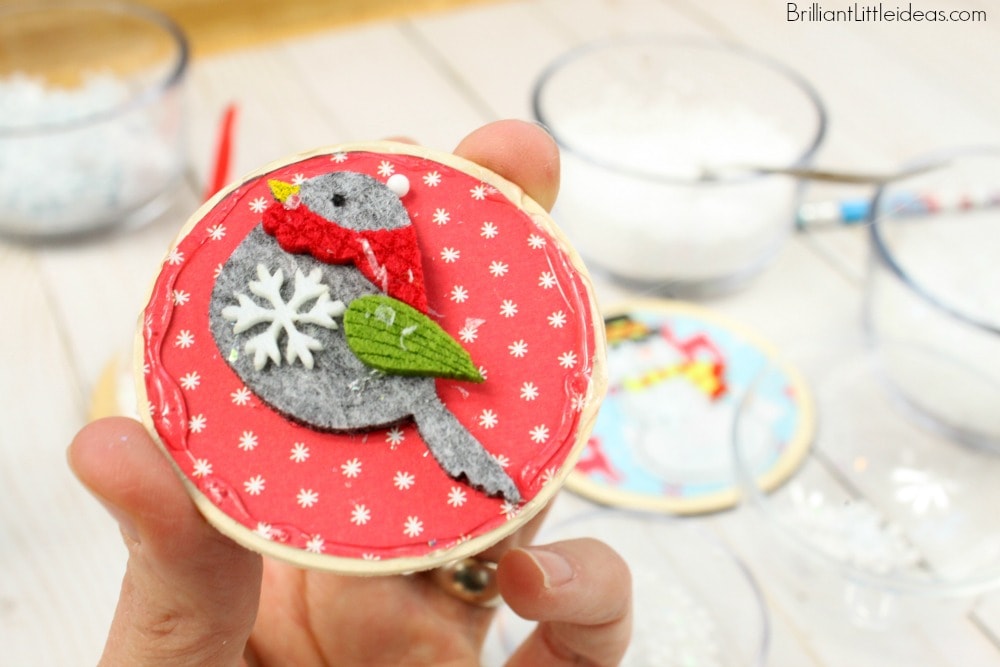
Once dry find a few fun stickers to stick on the scrapbooking paper. You’re going to make a scene behind the globe. The Snowman I used is linked here.
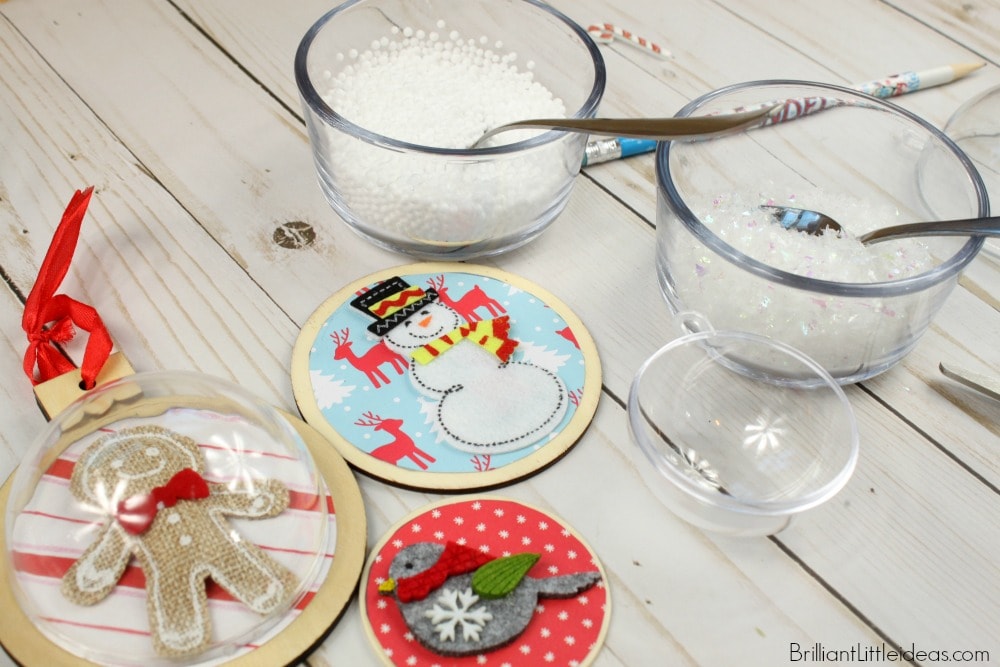
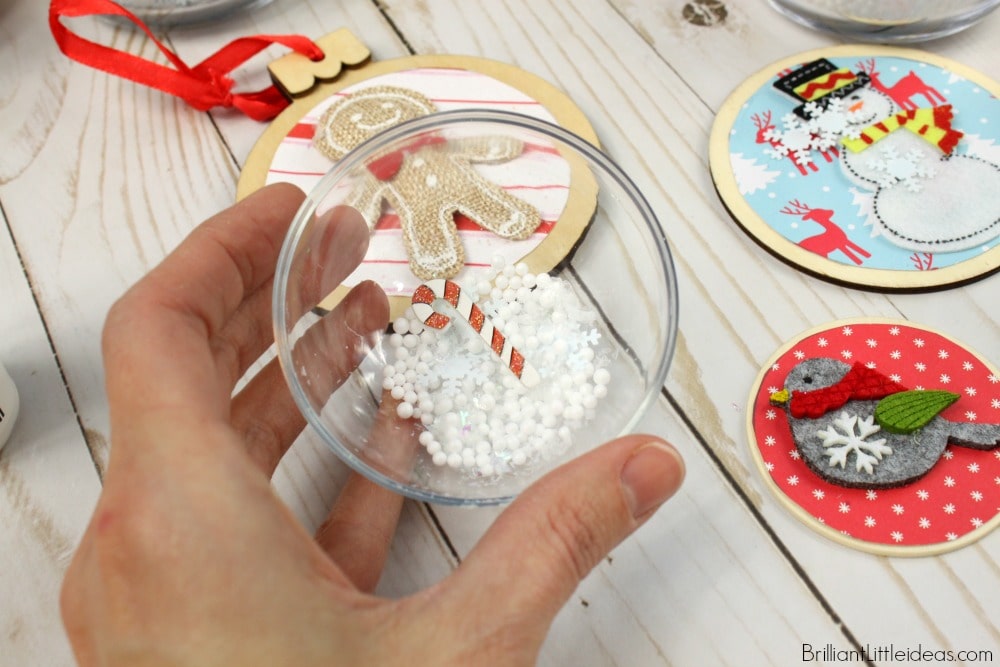
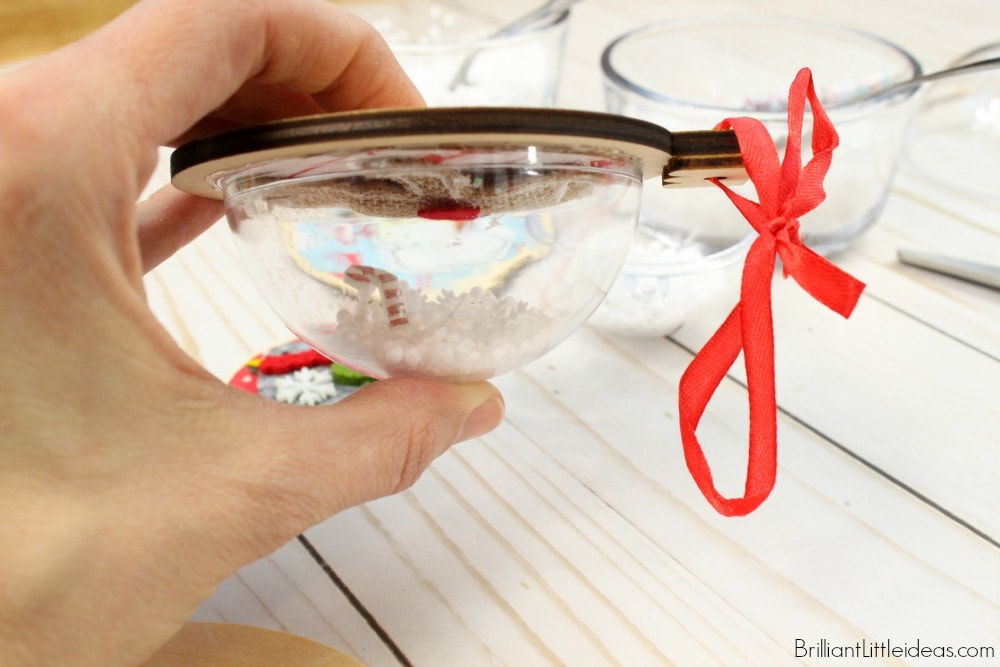
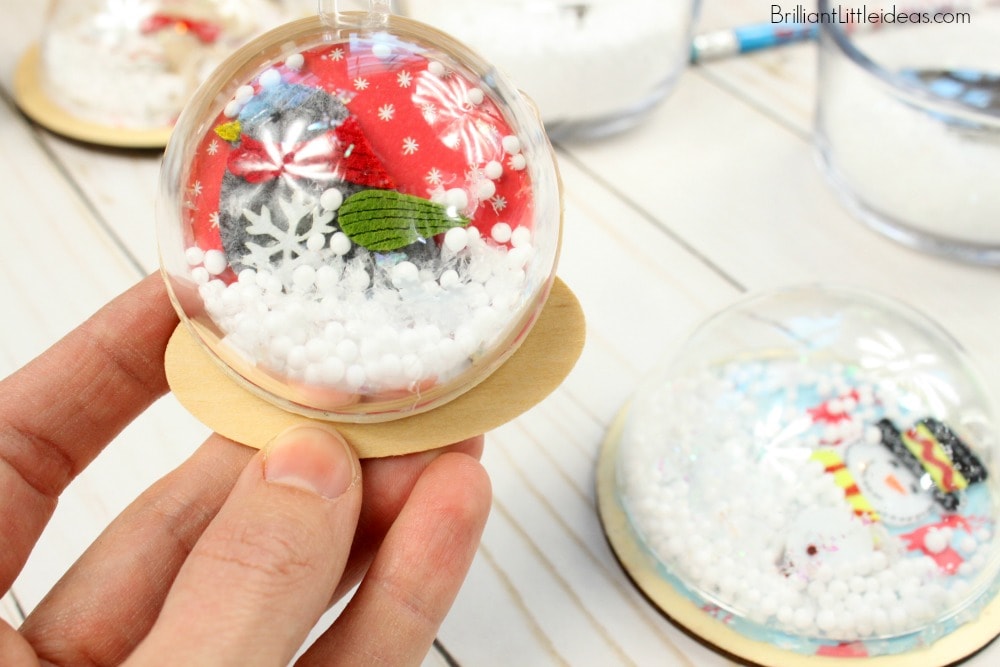
Fill the half ornament with these tiny styrofoam balls and some glitter snow for extra sparkle. You can also add in some glitter or small items such as buttons, snowflakes, or candy canes.
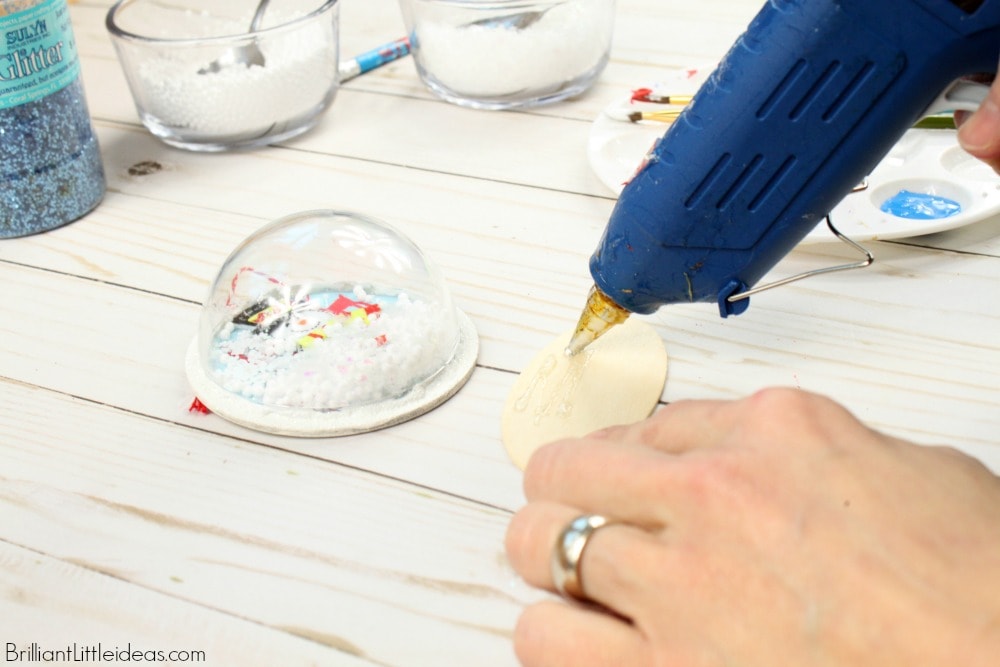
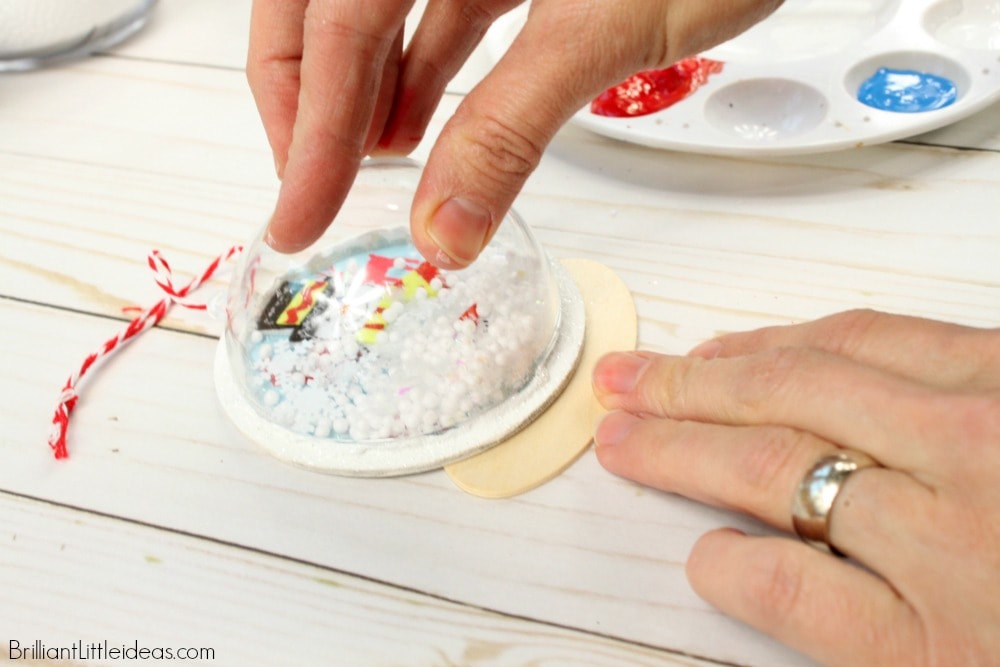
It’s going to be a little tricky to glue your dome to the wooden disk so be careful not to let the snow touch the wet glue. Take your super glue (my favorite linked) or E-6000 and trace around your half ornament putting a thin layer just on the edge. Match up your dome to the disk and hold upside down for a bit. If your using super glue this should take under a minute. E-6000 (if you choose to use it) is a stronger glue and slower to harden so that will need to set upside down for 24 hours.
You also have the option of tracing around the scrapbook paper like this picture below. It worked just as well as tracing the dome. So totally up to you.
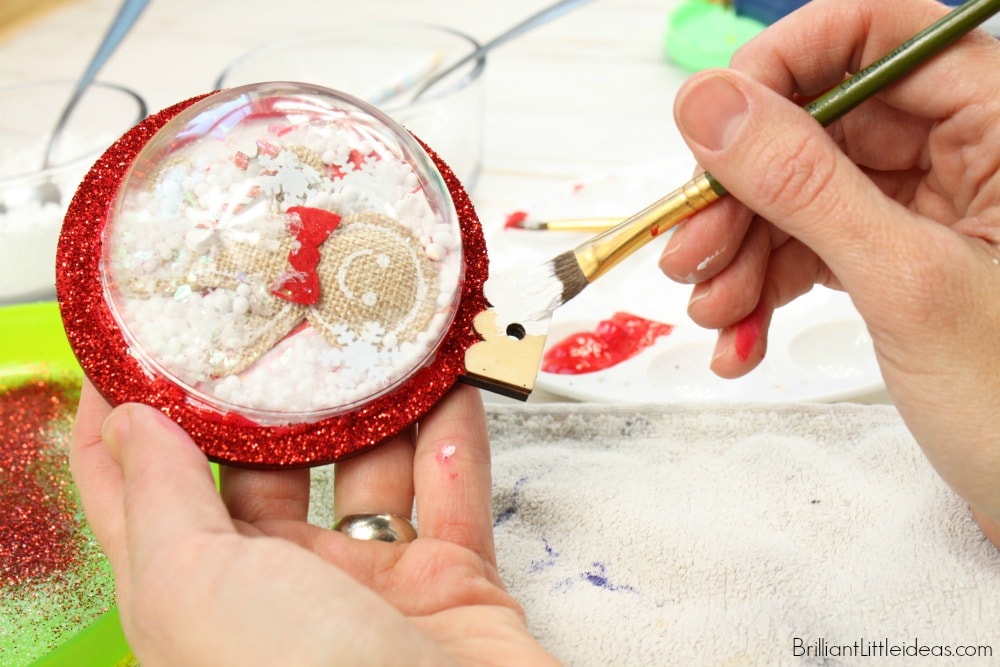
Once your snow globe is dry then we’re ready to paint!
I painted a few of the snow globes and just let them dry like that and some others I wanted a little more festive so before the paint dried I added some glitter and it turned out really cute.

Set your snow globe aside to let dry at least overnight. I may have gone a little too far on some of the glitter but hey… its a DIY Christmas ornament. People expect gifts like this and I’m sure would love a snow globe ornament for their tree… right? Right!!
If you think your circle snow globe needs a base then I have an easy fix for you. Using hot glue or E-6000 (not super glue because it won’t stick) glue a wooden oval shape to the bottom of your globe like below.
Again, paint it the color you want and then decide whether to glitter or not to glitter. Either way, let it sit overnight until the paint is completely dry.
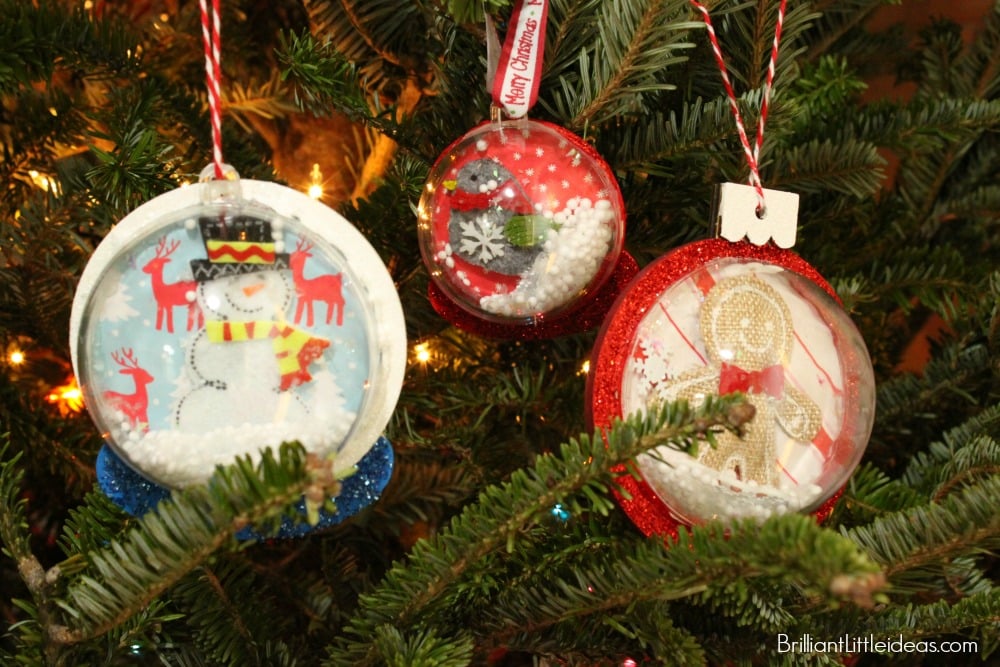
That’s it! You’re done, now aren’t they cute!
Do you have homemade Christmas ornaments on your tree?