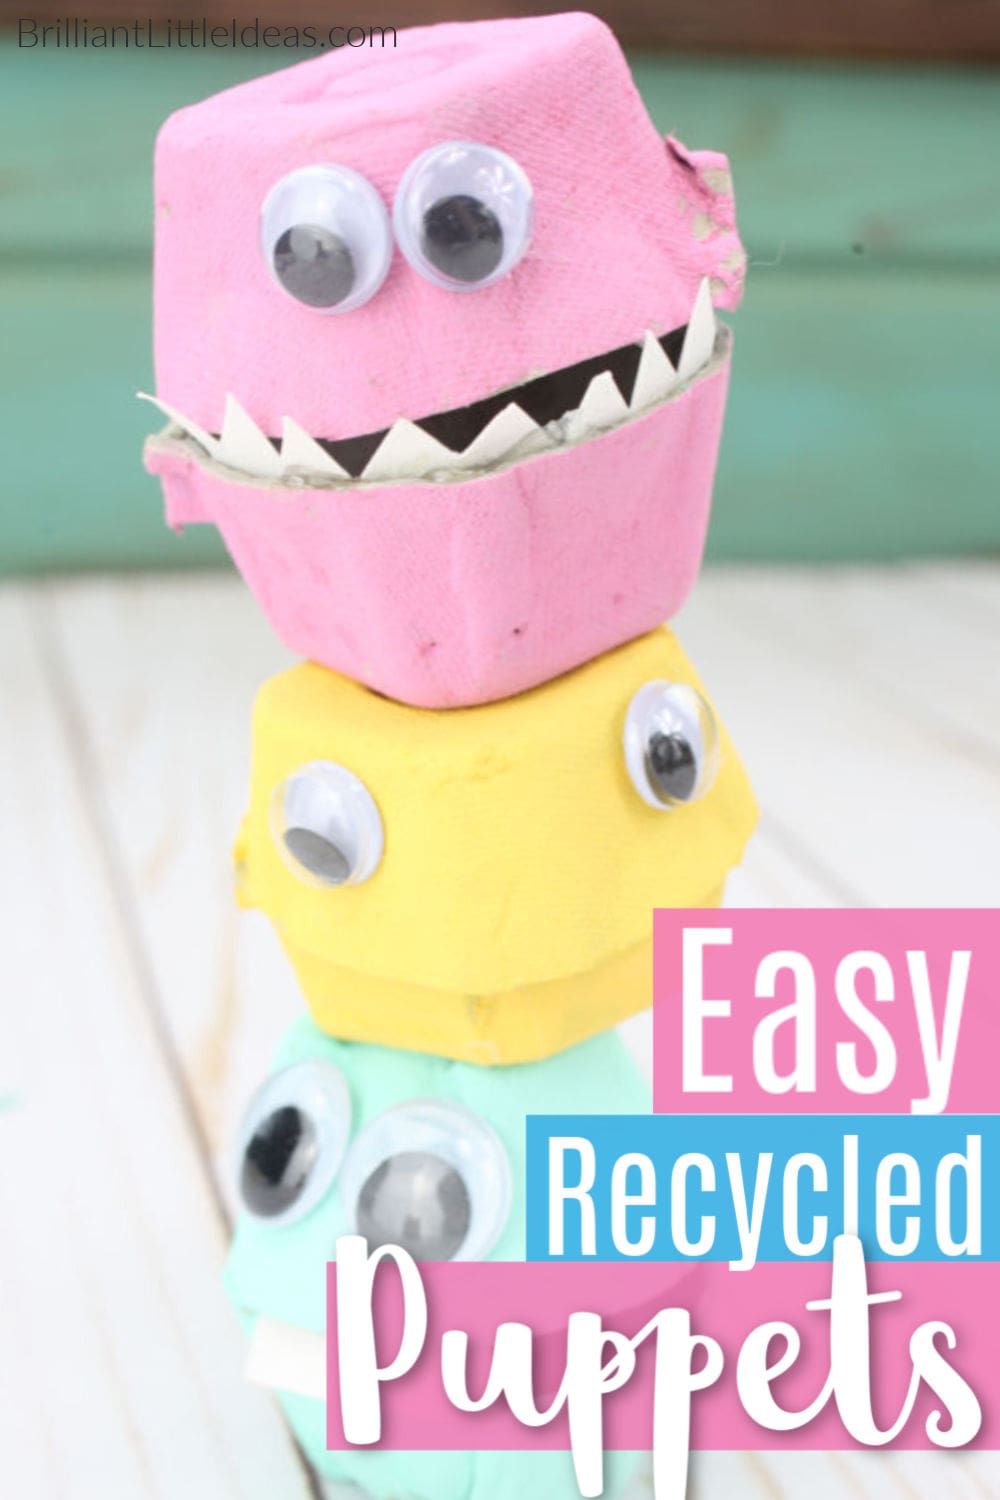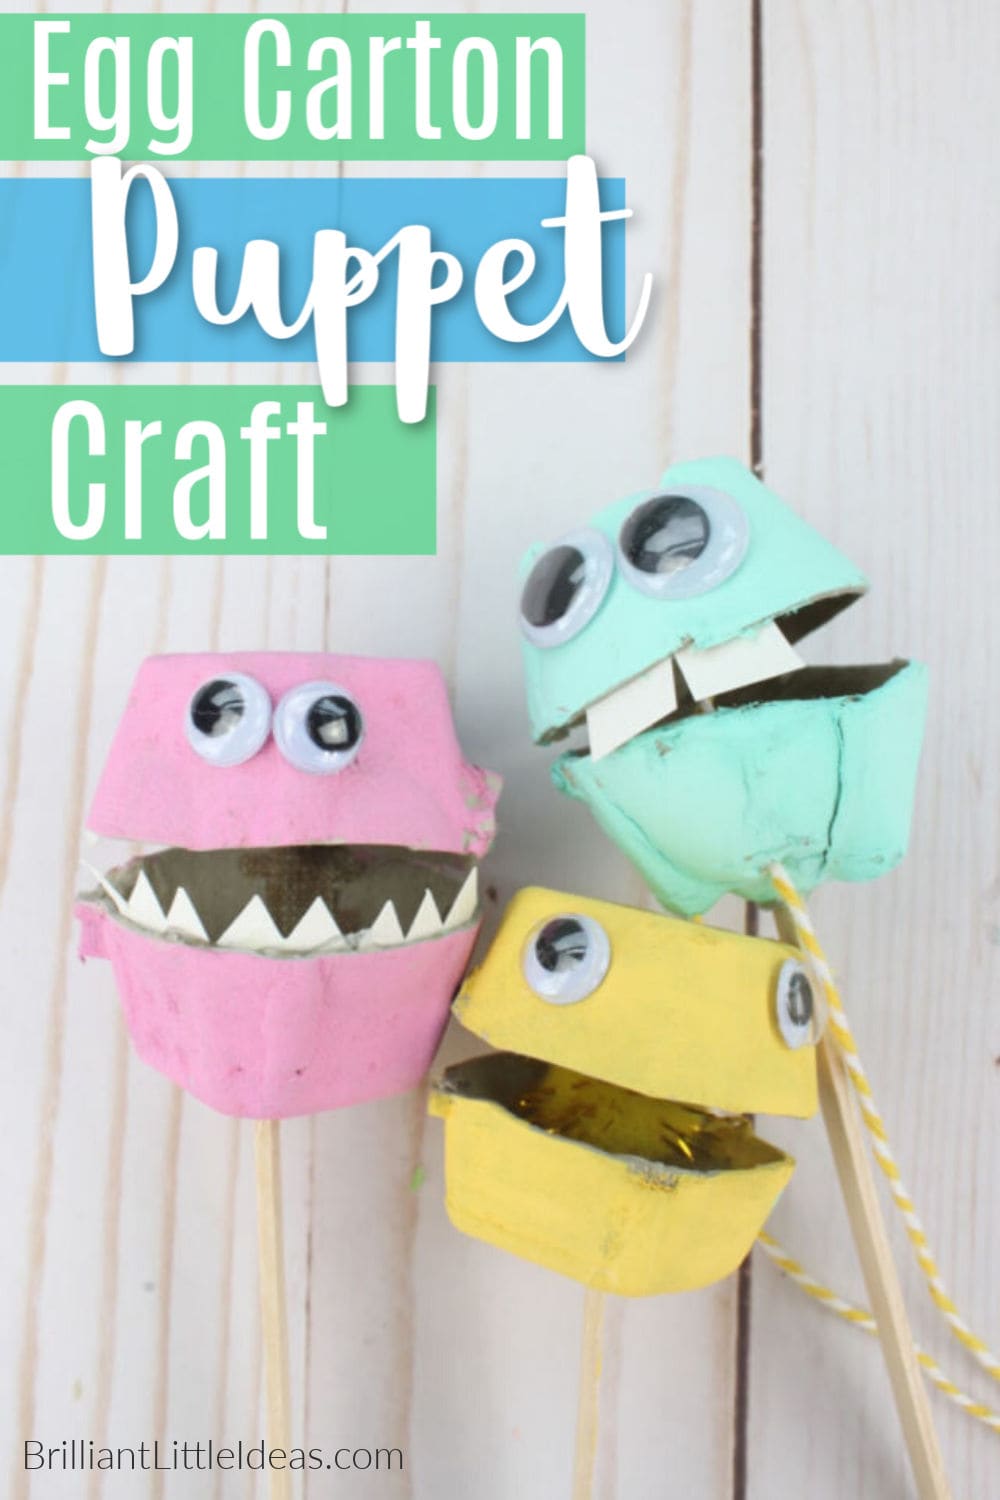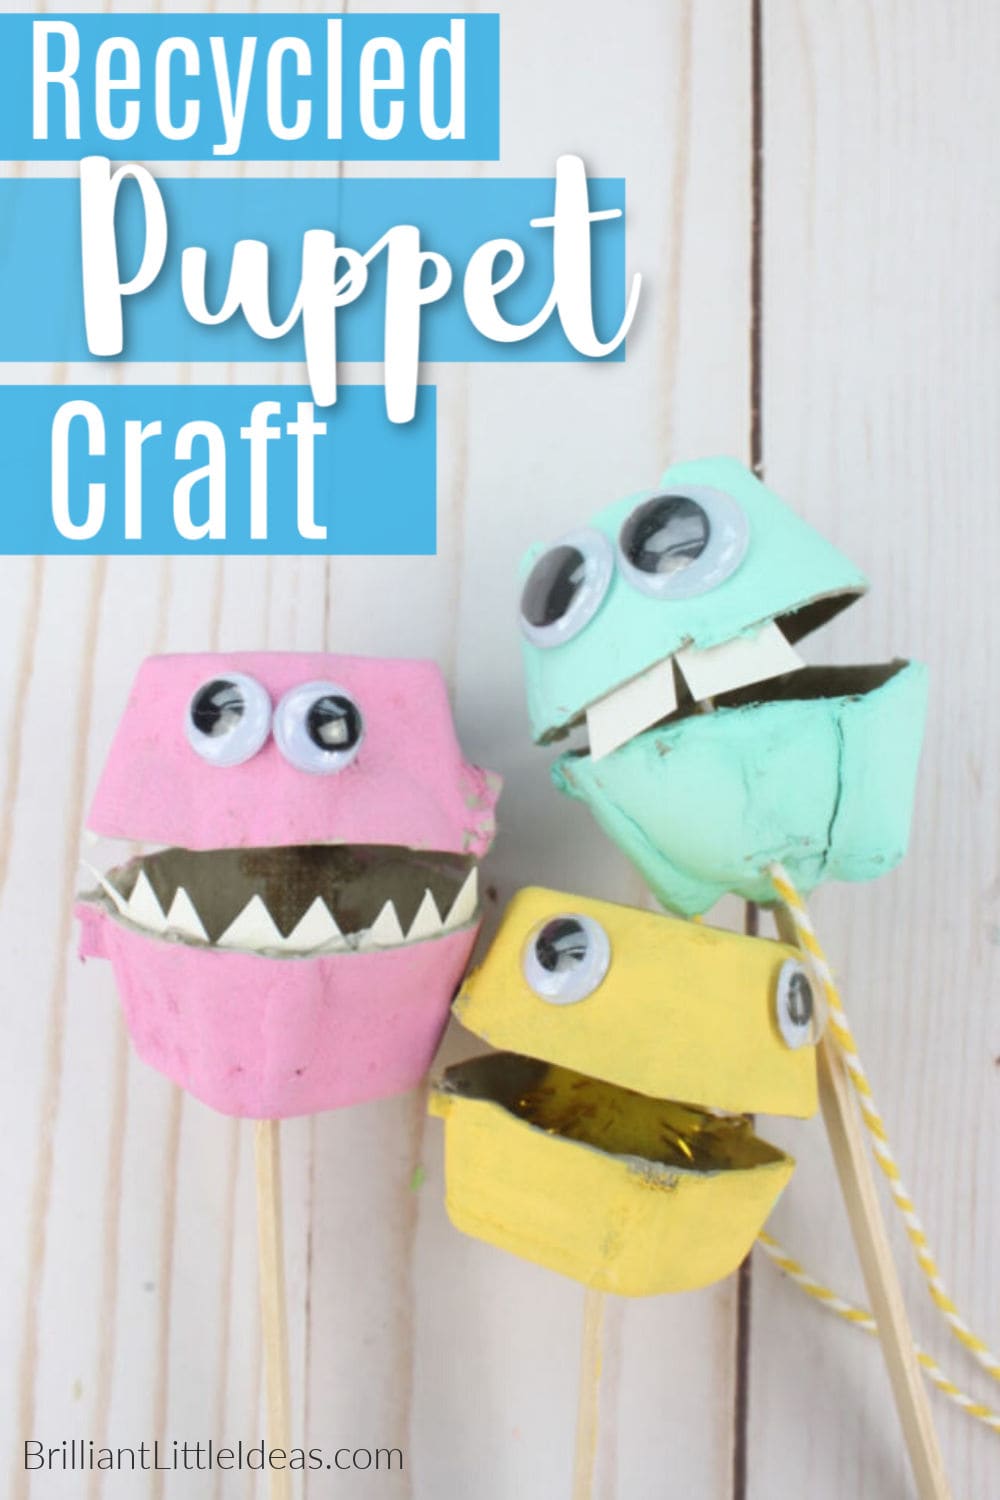
Easy Egg Carton Puppet Craft for Kids
Don’t want to throw away that egg carton? Make a super cute Puppet with this easy Recycled Egg Carton craft.
*This post probably has affiliate links at no cost to you! That means I may make a small amount if you purchase from my links to pay for more crafts or to feed my coffee addiction. See more about that in my Disclosure Policy (here).

Easy Egg Carton Puppet Craft for Kids
I am always looking to recycle used things into fun kid’s craft projects. I try to keep a few things like paper egg cartons, paper milk jugs, formula containers.. the list is extensive. I even have a box of odds and ends so the boys can make things on their own.
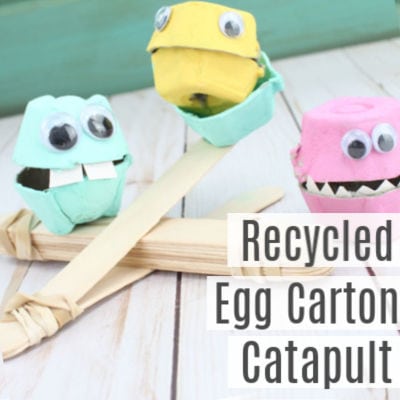
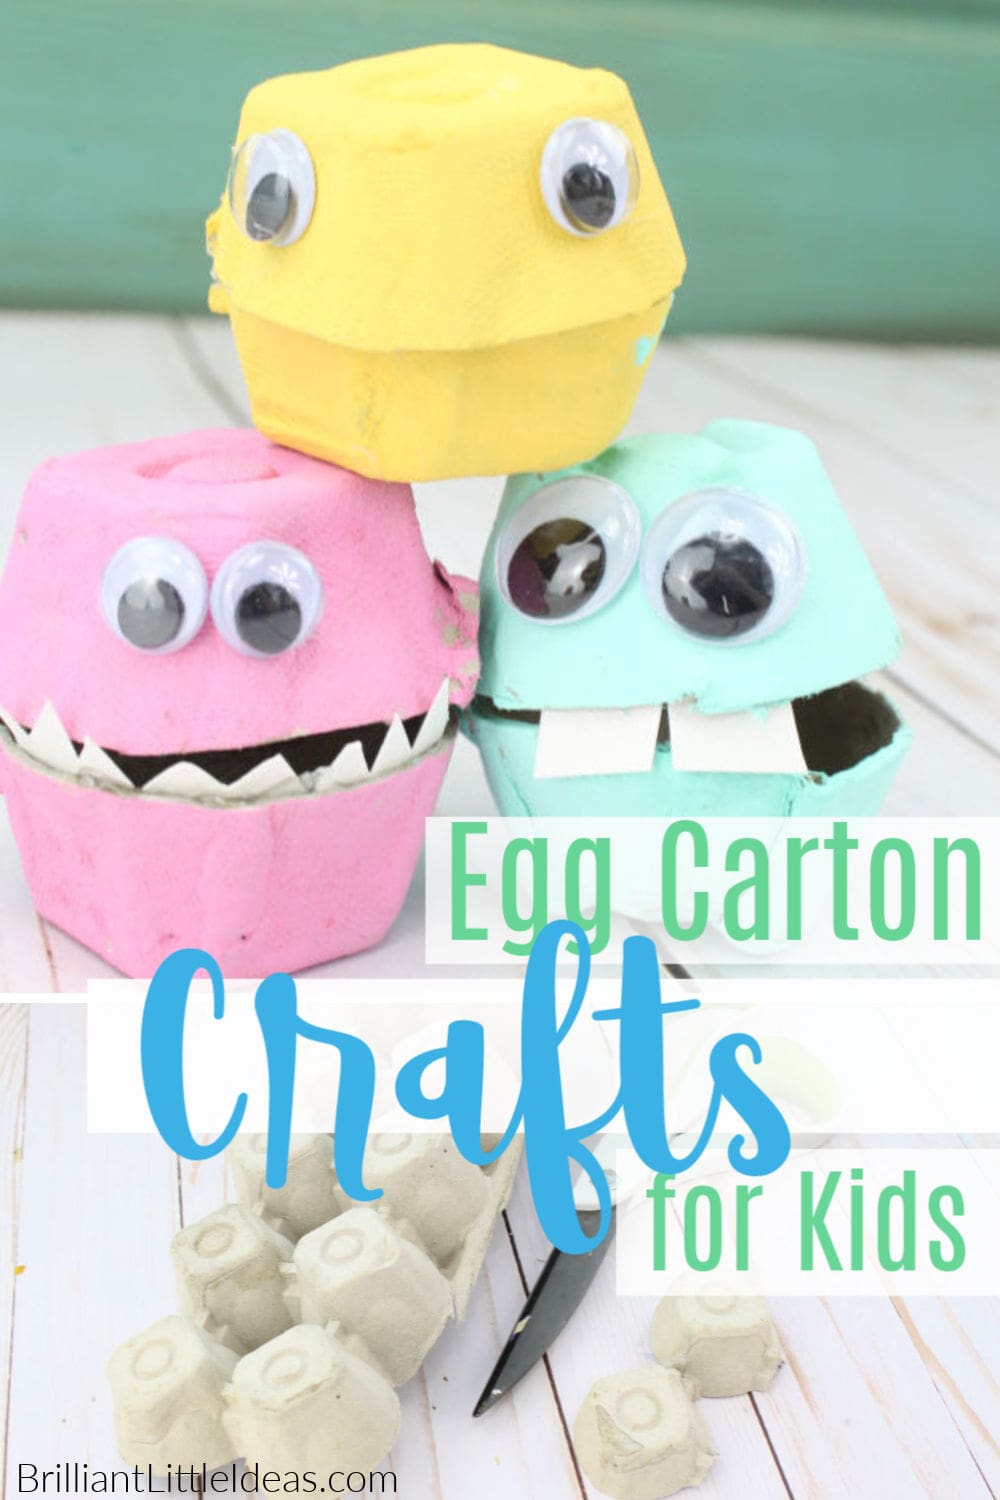
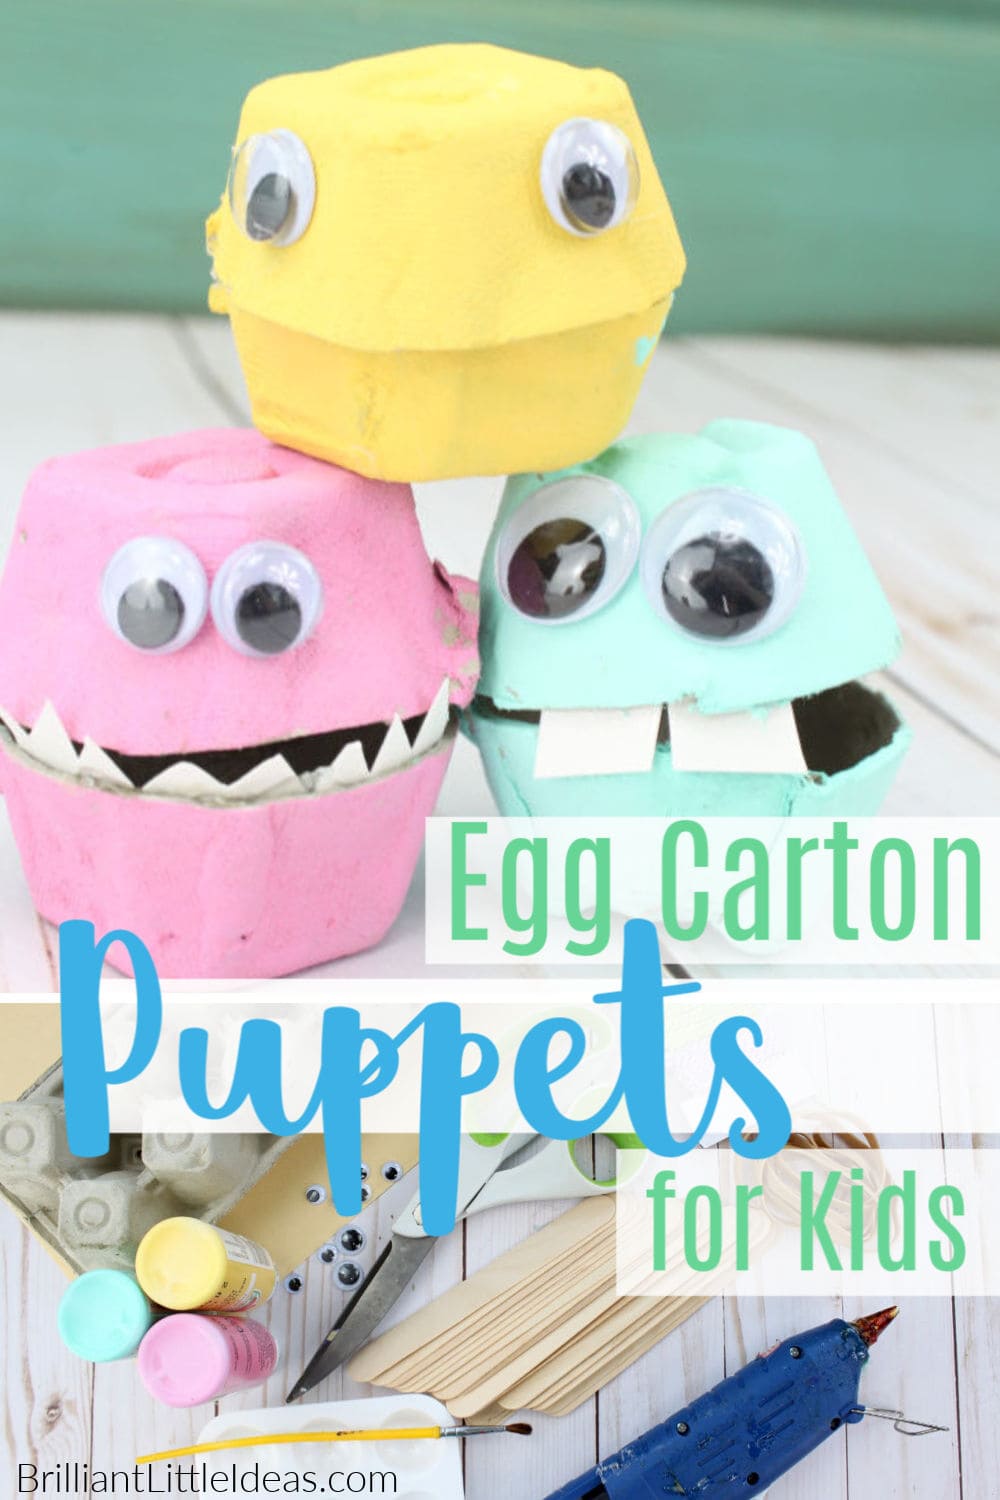
Today the kids and I decided to use up some paper egg cartons. We made Egg Carton Paintings, DIY Catapult with Craft Sticks and Egg Cartons, and these super cute Egg Carton Puppets.
You probably already have most of the things you will need to make these Puppets.
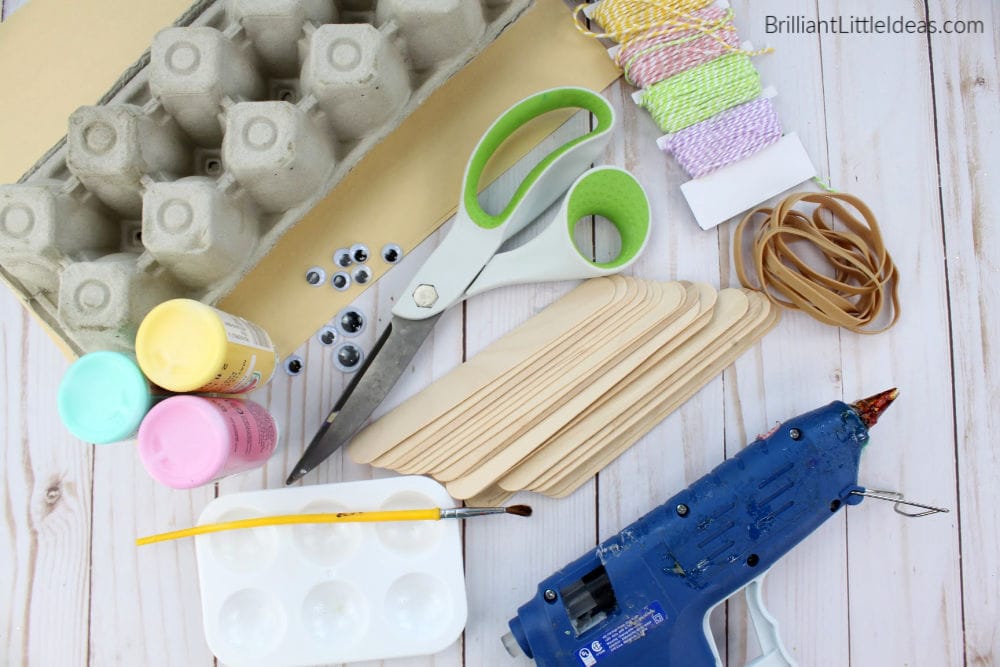
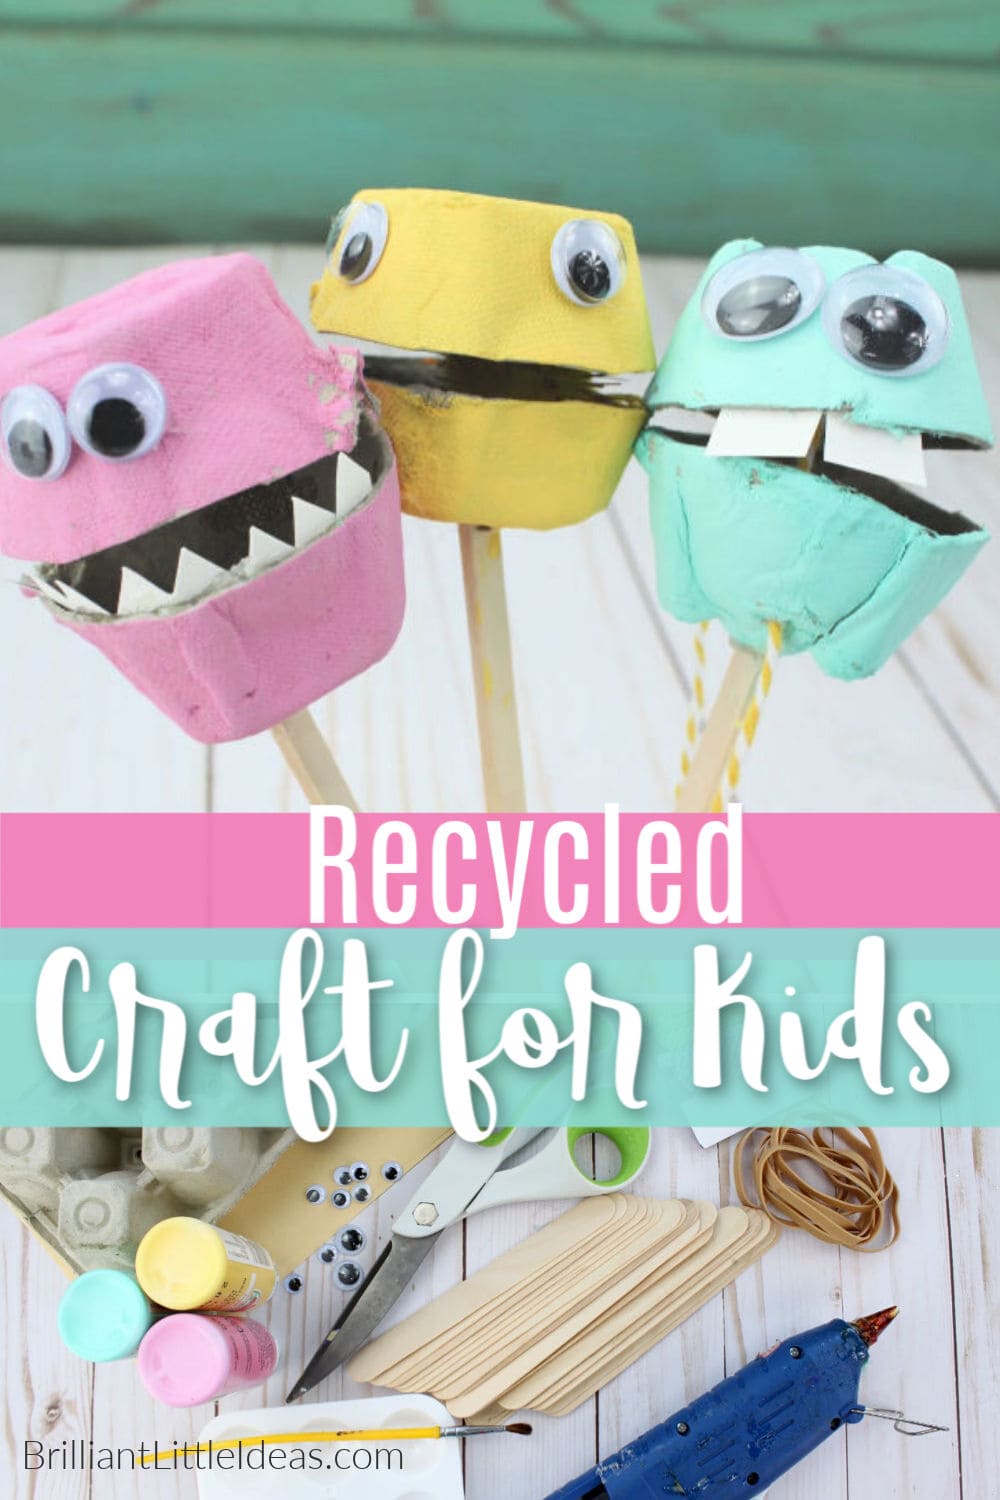
Supplies
- Paint of your choice (linked)
- Paint Pallets & Brushes (linked)
- Regular Craft Sticks (linked)
- Hot Glue Gun & glue sticks (linked)
- Scissors (linked)
- Colorful String (linked)
- Ribbon (linked)
Easy Egg Carton Puppet Craft for Kids -Video
Easy Egg Carton Puppet Craft for Kids -Pictures
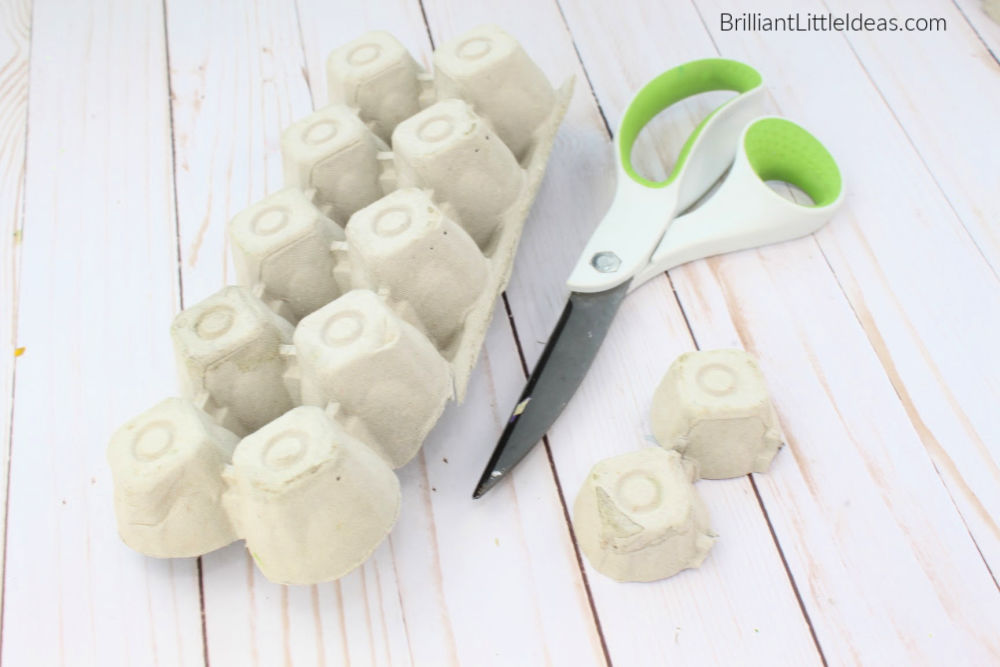
To start cut your egg carton in sets of 2. Try and keep them together to make a top and bottom for your puppet. If you have to trim them do that. It will all depend on your egg carton.
If one side falls off no problem at all! I have a quick fix for you below.
Once you have the set of 2 cut from the egg carton and trimmed, it’s time to fold it. Your egg carton may have an extra piece that may need to be trimmed. See the picture below.
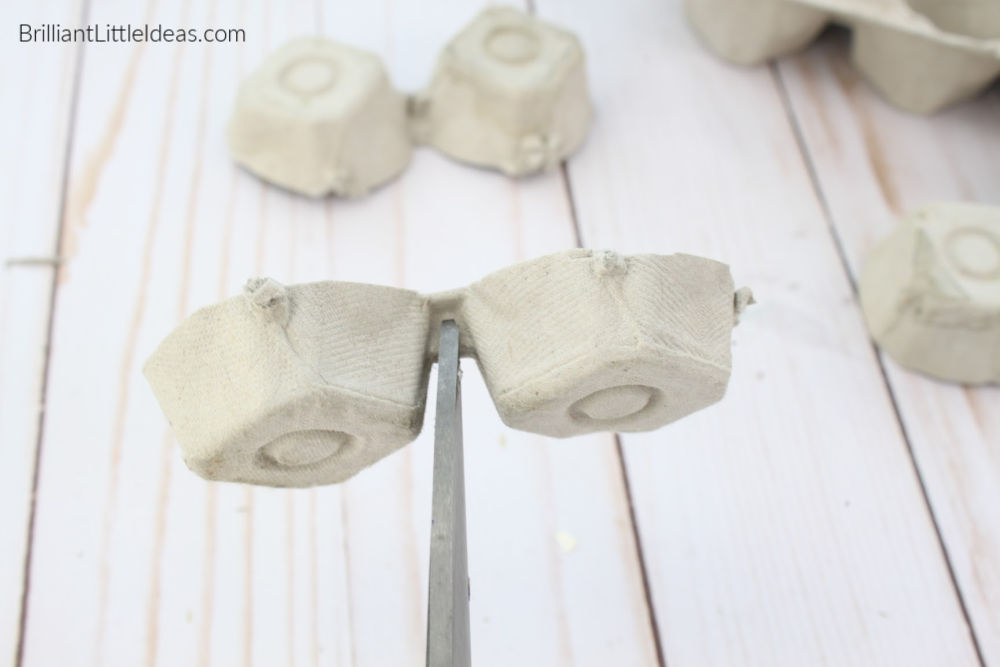
They should close easily once the extra piece has been trimmed.
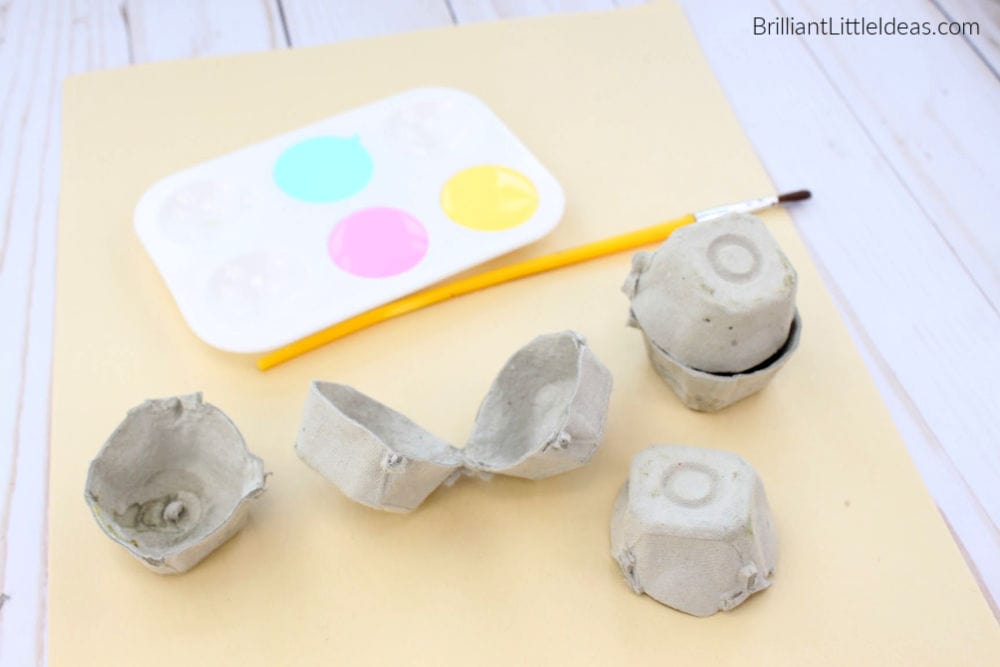
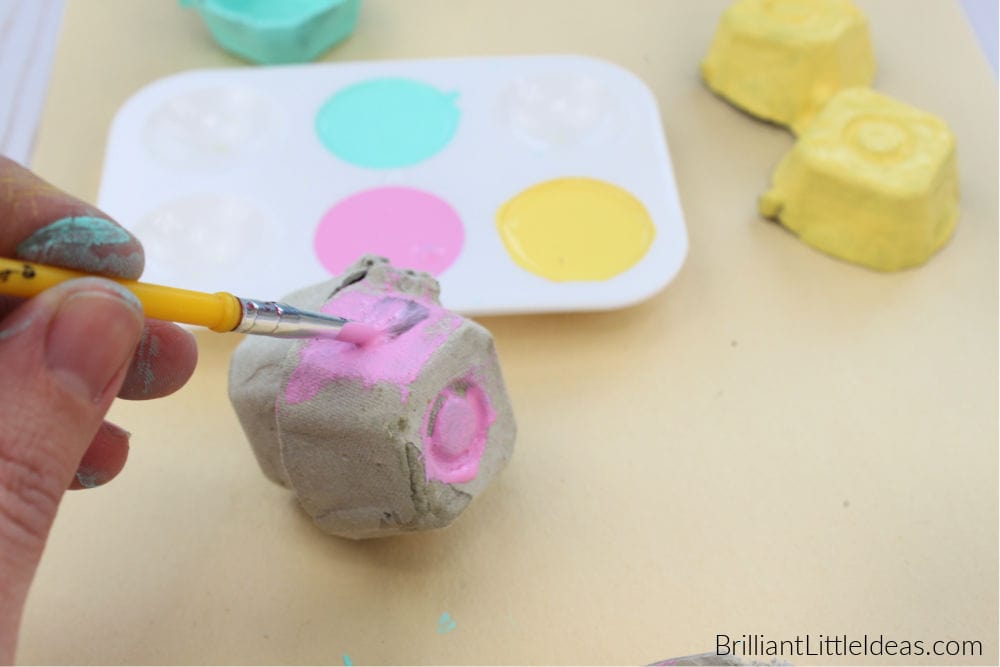
Go ahead and let your kids paint their egg carton puppets. Let them choose a fun color or 2 or 3! It may take a while to dry depending on the amount of paint your kids choose to use. My youngest son tends to load up on the paint. I usually have to smooth it out a tad after he’s done. Otherwise, with all that paint it would take a full week to dry. Ha ha ha ha ha!
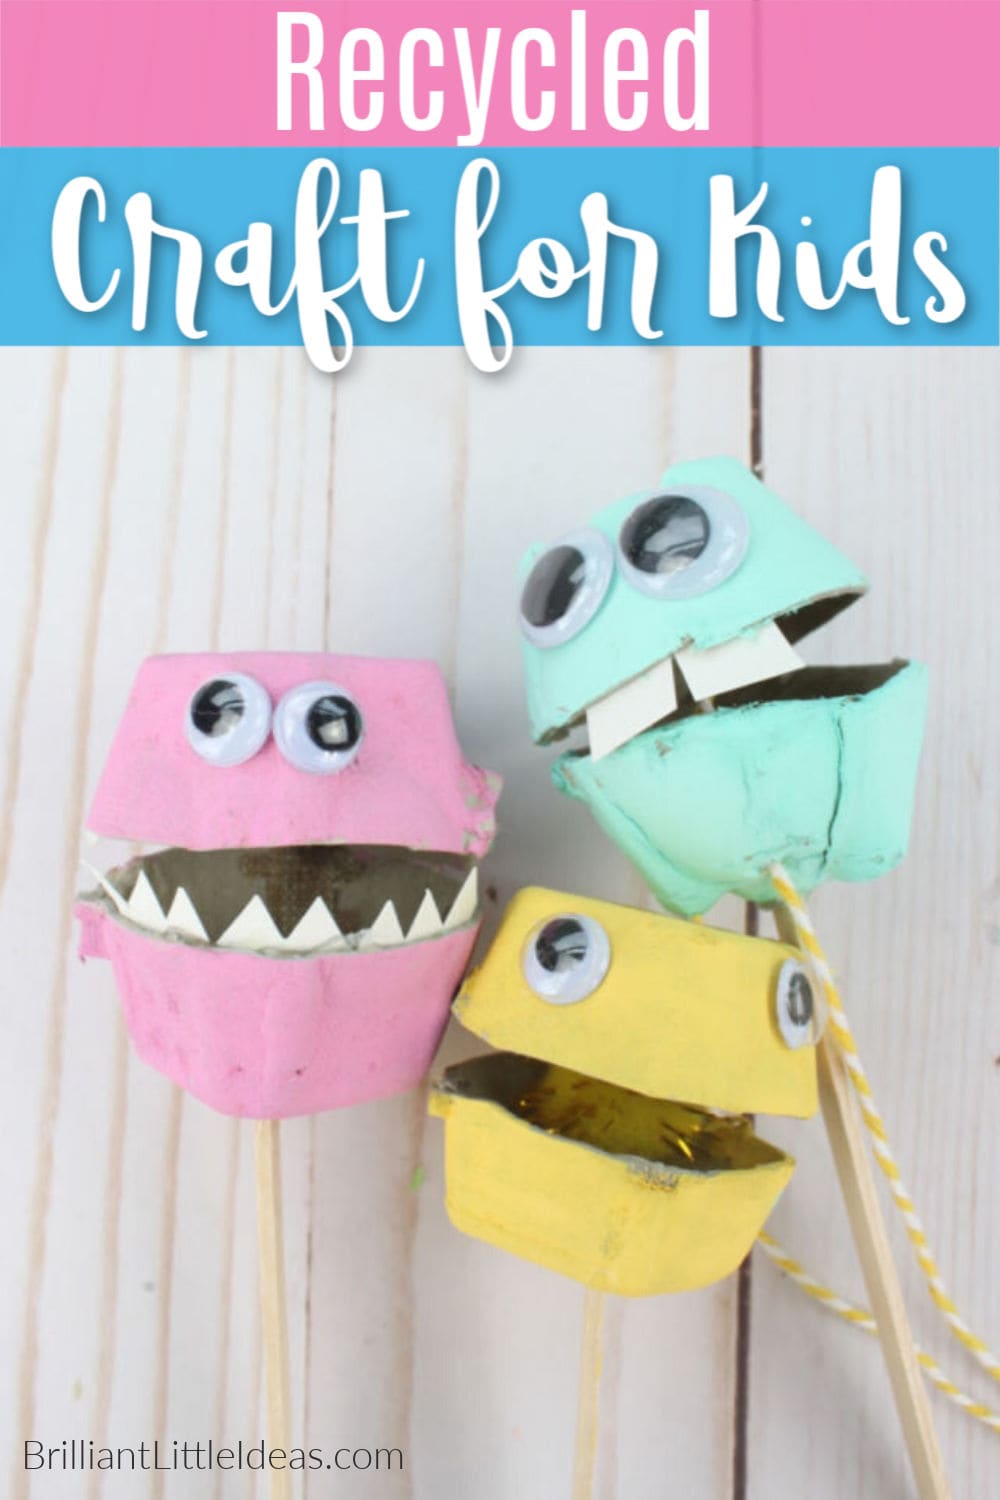
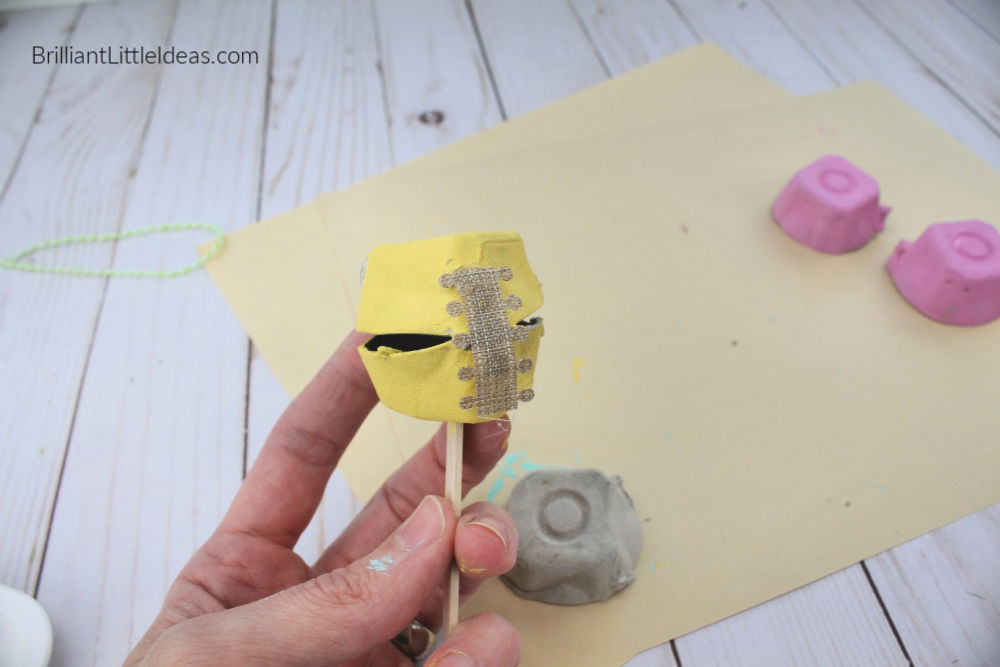
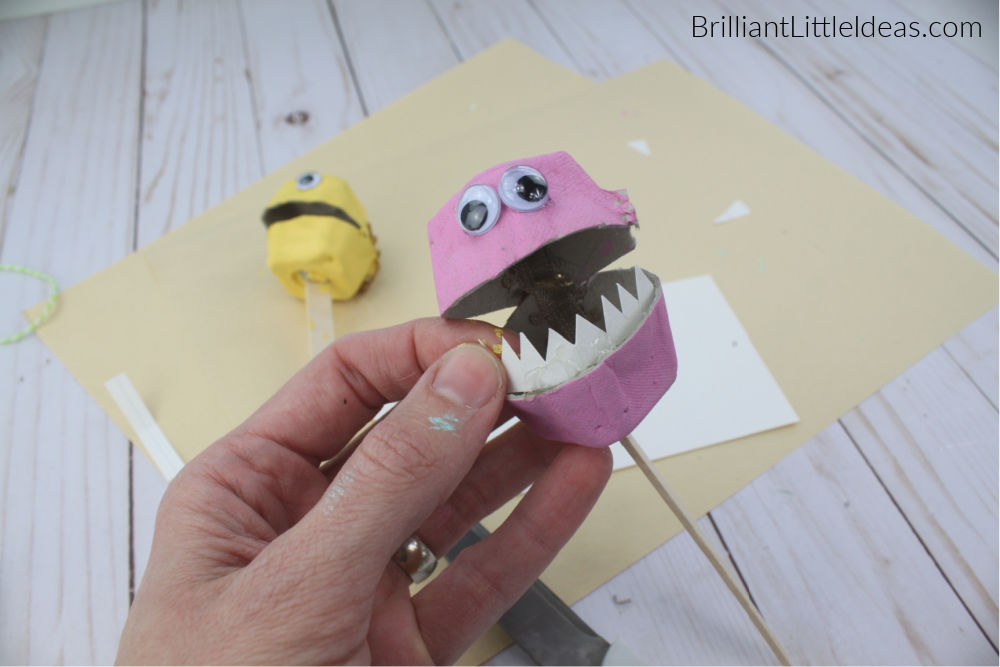
When your puppet is dry cut a small hole in the bottom just big enough to fit the top of a regular-sized craft stick. Put a dab of hot glue to hold the craft stick in place. (See picture below).
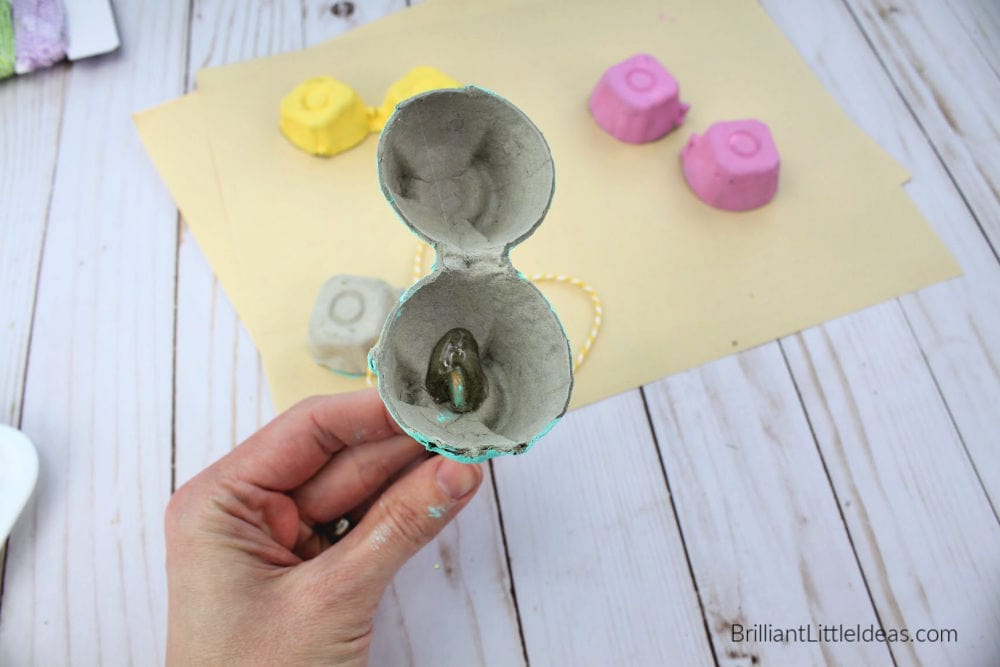
If for some reason your puppets head falls off. LOL! You will just need to take a piece of ribbon (like these)

Cut a small piece of ribbon (like these) and glue not only a piece of ribbon to the back but also to the insides just to be sure it stays. Be careful not to burn your fingers. Hold it in place with a pencil just in case.
You have two options:
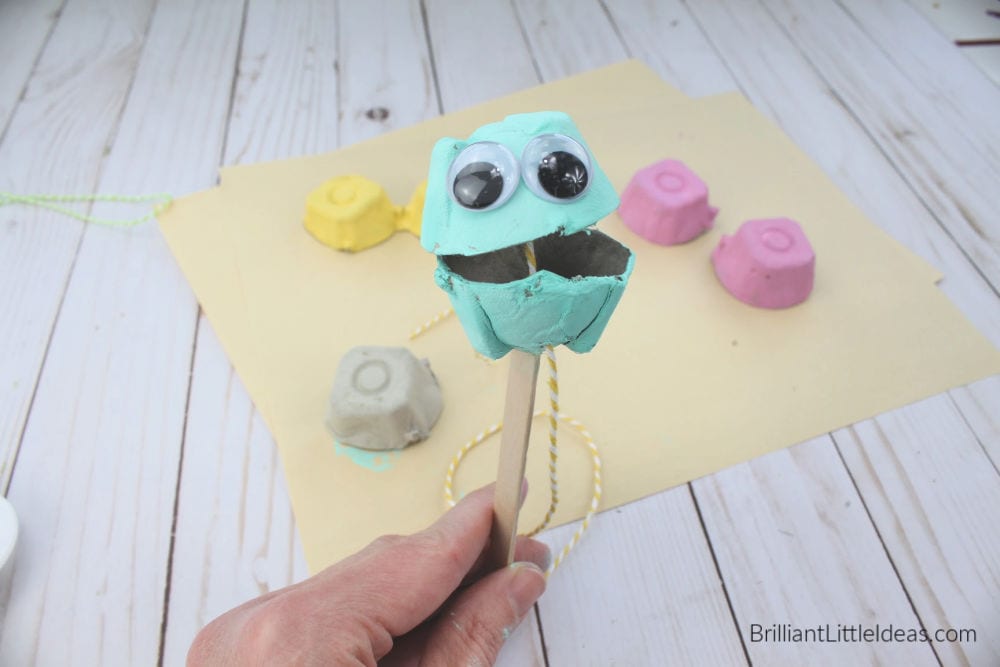
If you want your puppet to open and close its mouth you will need to run a string from the bottom to the top. Poke a small hole in the bottom of your puppet close to the stick right outside of the hot glue. The puppet’s string needs to move up and down so make sure to only glue the string to the top of the puppet.
You can also run a longer string through the bottom to the top and then out a separate hole in the head of your puppet. That way when you pull the string back and forth the mouth will open and close.

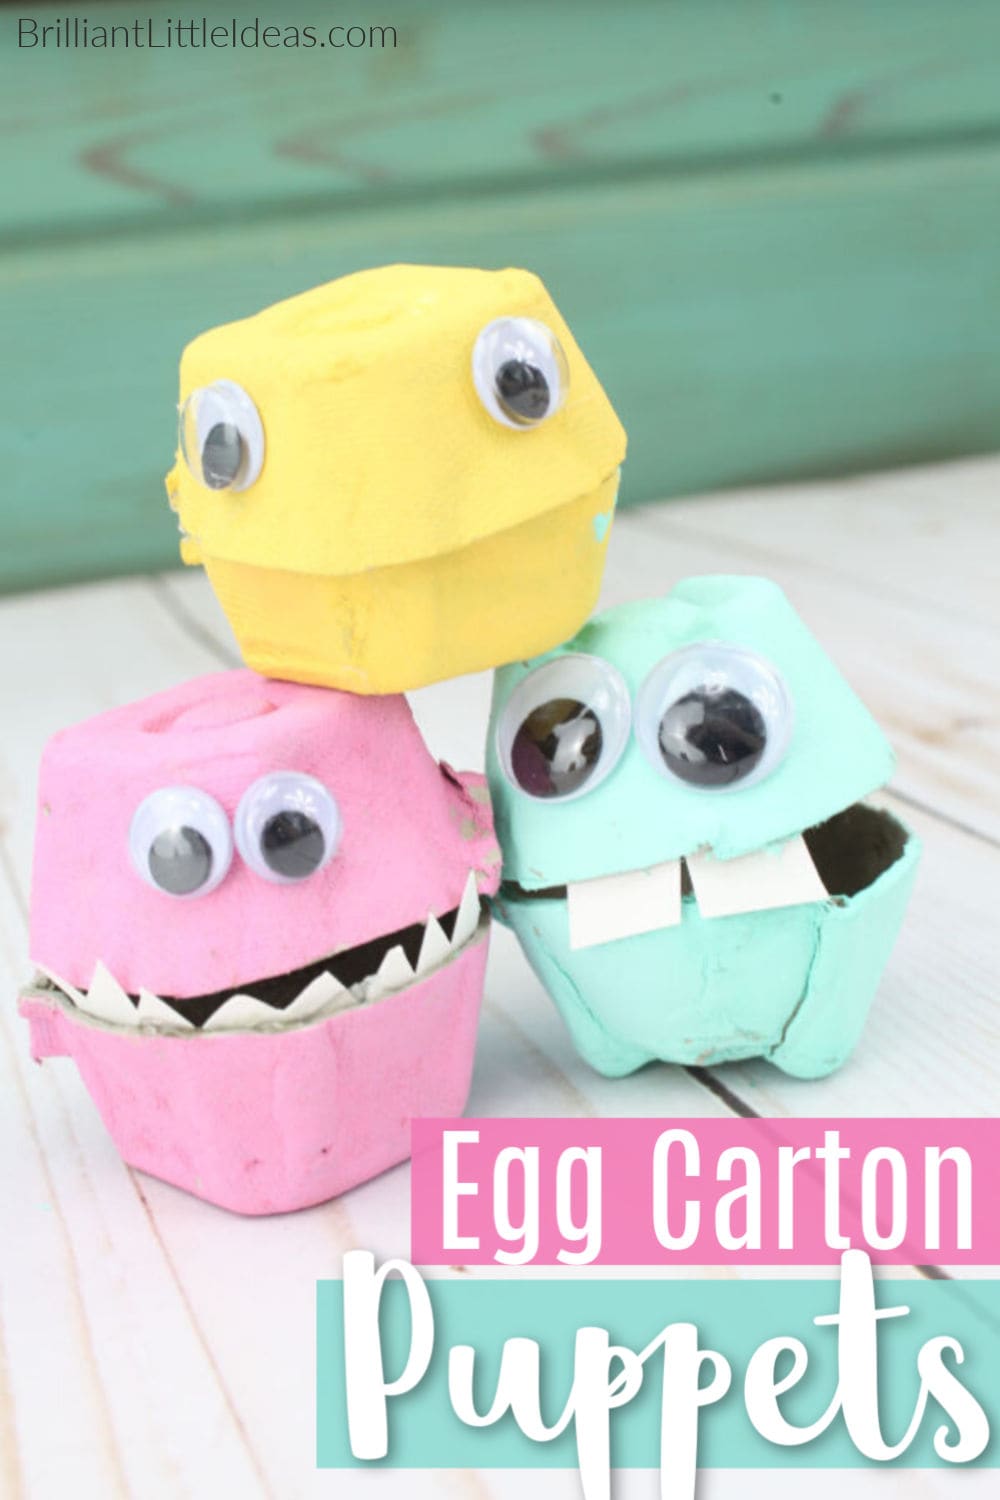
Hot glue an eye or two or twelve onto your puppet, it’s totally up to you.
From here you can add a nose, ears, hair, or even teeth! We had a lot of fun making teeth from index cards. Just cut them to fit.
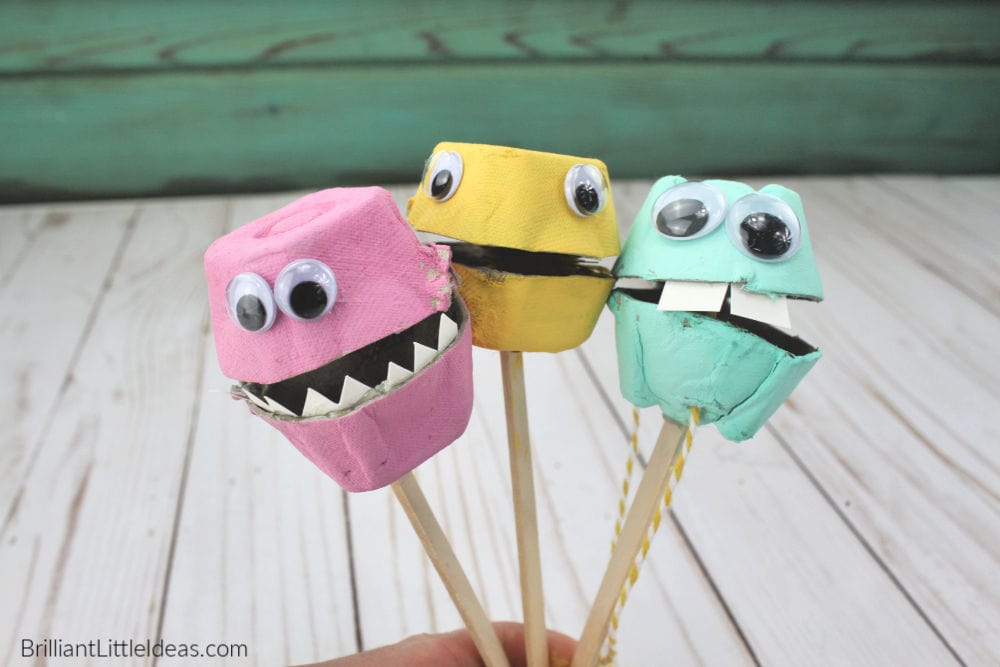
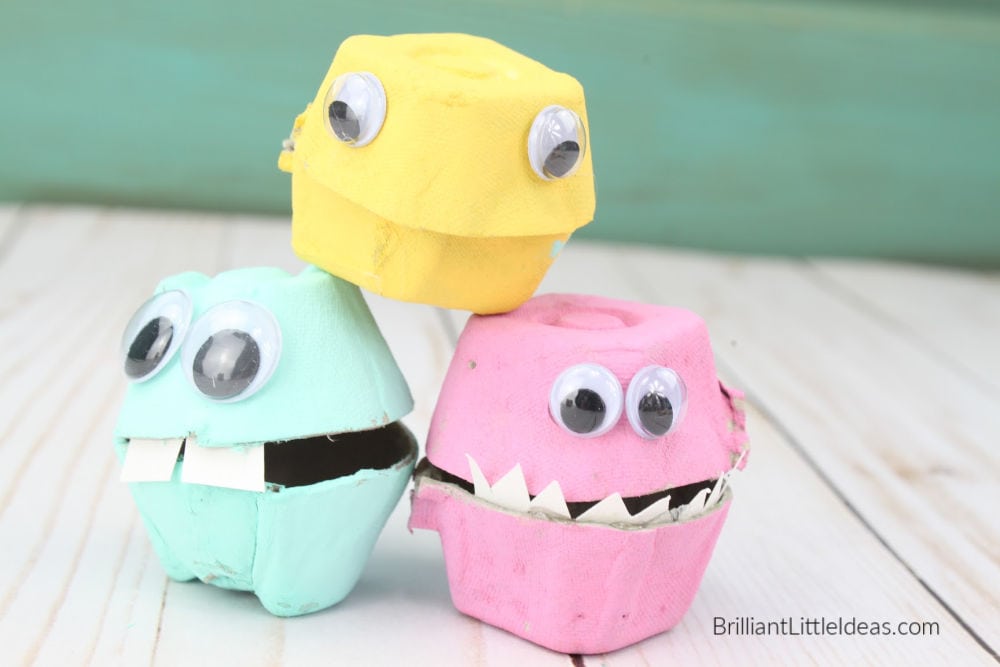
Here are three of our puppets! I would love to see what your finished puppets looked like. Send me a picture on Instagram or in an email.

*This post probably has affiliate links at no cost to you! That means I may make a small amount if you purchase from my links to pay for more crafts or to feed my coffee addiction. See more about that in my Disclosure Policy (here).