
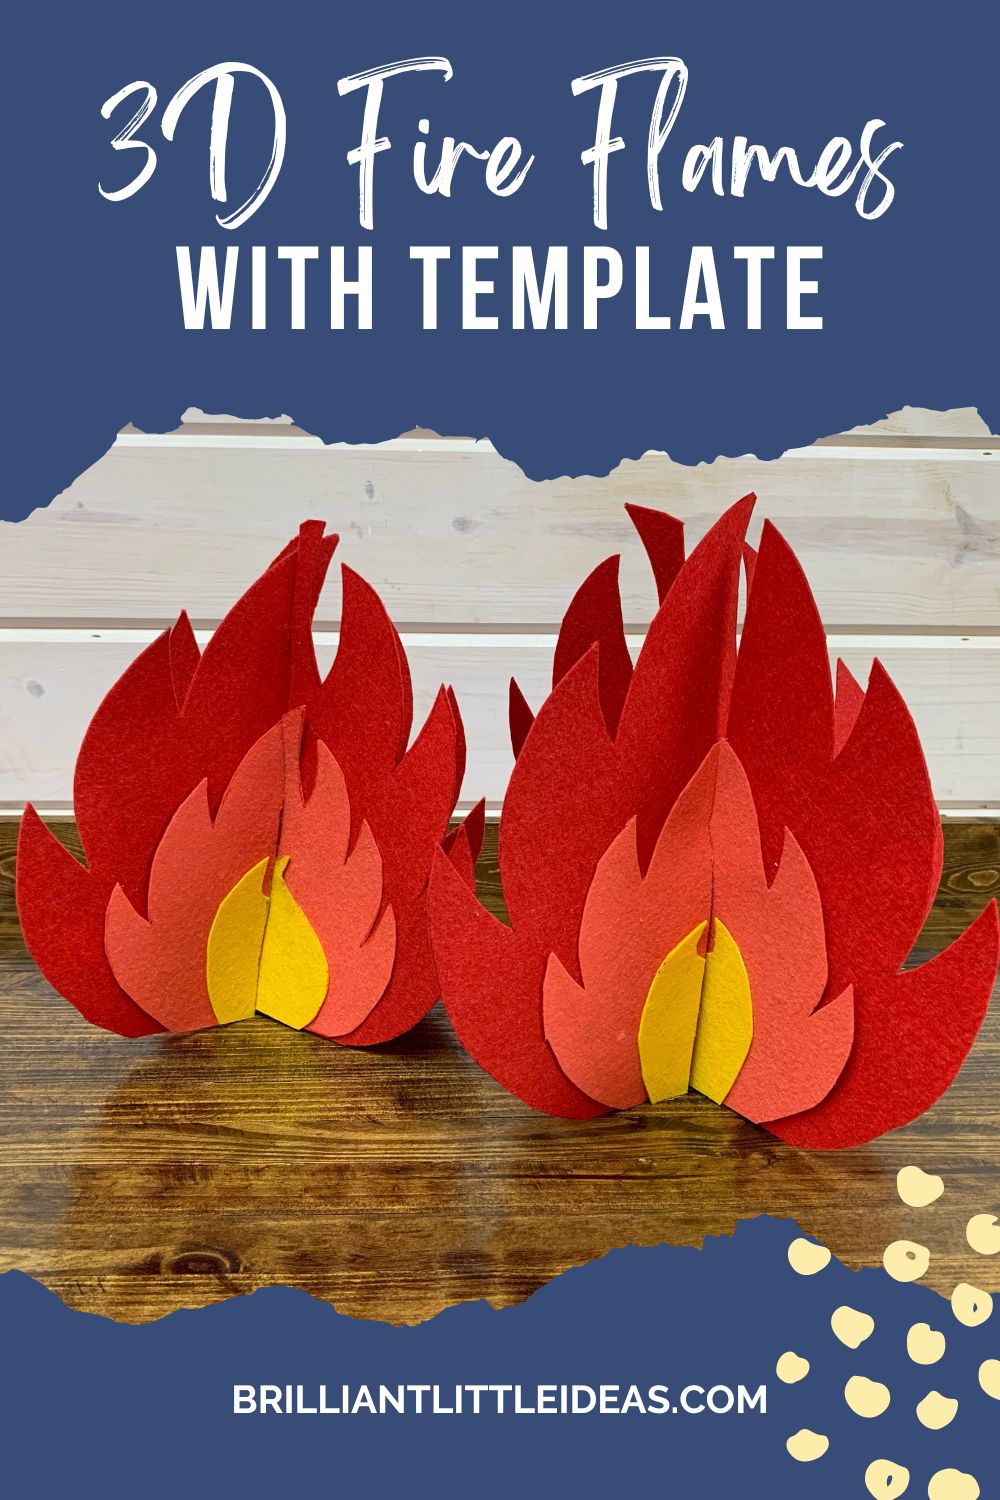
How to Make 3D Fire Flames with Printable Template
Do your kids love having a campfire? This easy DIY 3D Fire Flame with Printable Template can be made with felt, foam, or cardboard. Indoor pretend play campfire fun for kids. Great for a Fireman theme too.
It can be the hottest day of summer or a boring day in the colder months and they want roasted marshmallows. Try these easy to make pretend play marshmallows to roast over your new 3D fire flames. It’s a safe way for kids to learn some fun facts about an open flame without the high temperature.
Topics
Choose your own flame colors! If you want some blue flames or maybe some green flames at the bottom of your 3D fire flame no problem just add a touch or a lot. The fire flames are yours to create so use all different colors or several different shades of the same color. Or just let the kids choose the color of your campfire when you buy your supplies.
If you have a few empty paper towel rolls and you want to make some fake logs. They don’t have to be huge logs even toilet paper rolls will work. I can show you how with these DIY Fake Log Templates. Otherwise, your kids can just color them with some brown and black crayons. Add a little wood grain with either a brown or black permanent Sharpie. It will be like having their own cozy fire
This 3D FIre Flame will also go well with this Fireman Theme fun for kids. It’s filled with templates and you can even make your own DIY Fire Extinguisher!
Keep this set in your closet and surprise them by setting up the perfect fire pretend play stations in different places around your house. Like the fire station, a good campfire outside of a log cabin or you could even teach them about the early humans and how they cooked with flames and used it as a form of light. The possibilities are endless. Your kids are going to have a blast not only making these but also playing for hours! Get ready to spark some creativity and get that imagination revved up for some fun!
This post contains affiliate links. If you use these links to buy something we may earn a commission (at no cost to you). Thanks for the support! See our Disclosure page.
How to make 3D Fire Flames -Pictures
Let’s get started making some fire flames! It shouldn’t take a long time to make. The total time for me was just under 20 minutes. If you use E-6000 as the glue then please wait a full 24 hours so it can set properly. Make sure to allow enough time to get this done if you have littles from cutting to glue time and all.
The end result of this fun DIY fire flame is for your kids to play. So be careful with the scissors & glue or glue gun. Your kids can help with this if they are big enough. You be the judge, no one knows your kids like you do!
What You Will Need to Make 3D Fire Flames
- Color of the flames you choose (this is what I used)
- Red -2 sheets of Large 9 x 12 Stiff Felt
- Orange -2 sheets of Large 9 x 12 Stiff Felt
- Yellow -1 sheet large 9 x 12 Stiff Felt
- Glue -Felt glue,
- E-600, or a
- Low temp glue gun
- Scissors
- Black Sharpie -Fine tip
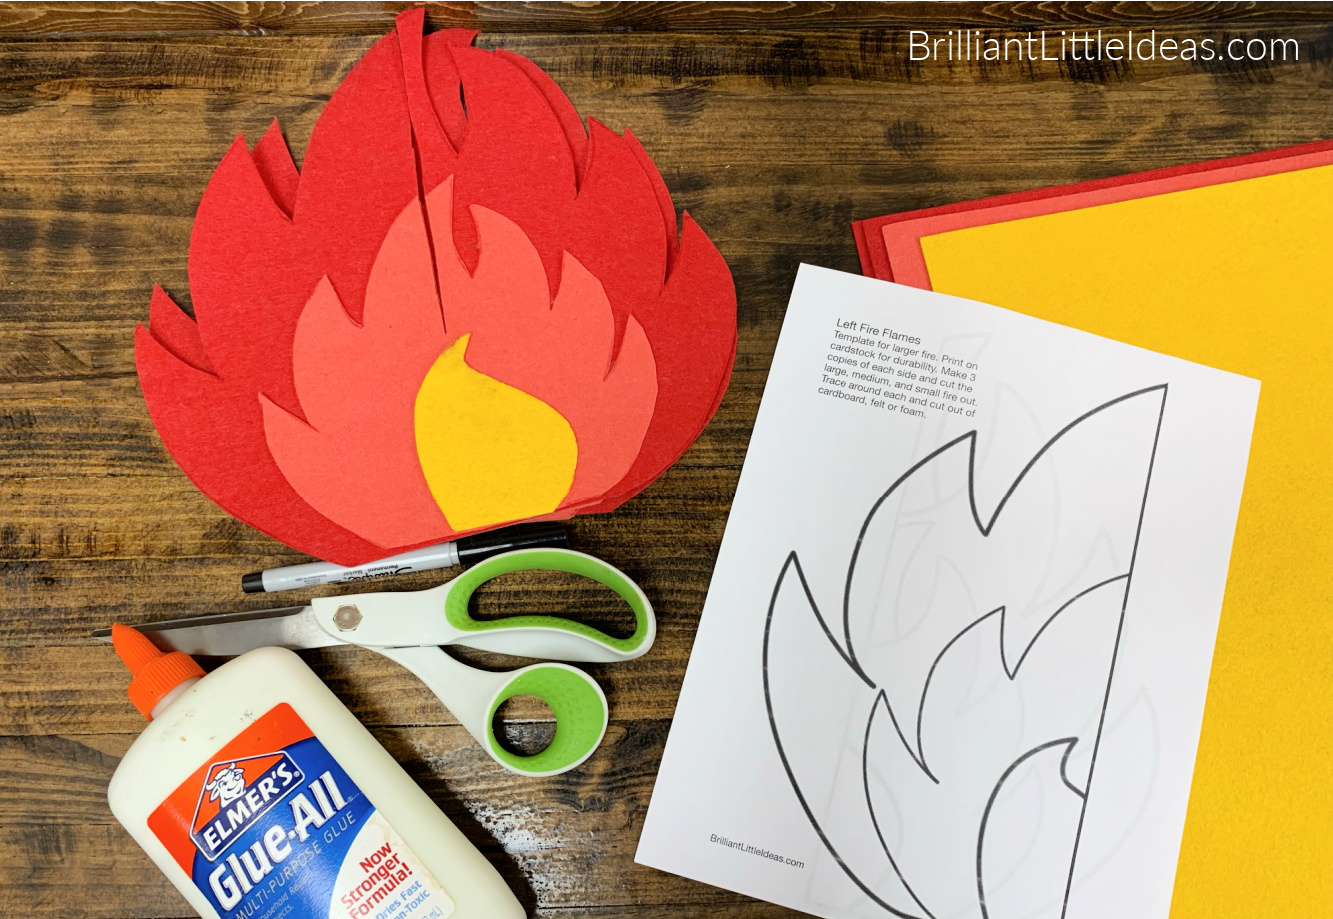
- 3D Fire Flames Template (at the bottom of this post)
- Cardstock (optional for durability)
First, you will need to gather all of your supplies: for the colored flames, you need red, orange & yellow stiff felt, glue, scissors, a fine point black sharpie and you may need a plastic bag or trashcan for the leftover pieces.
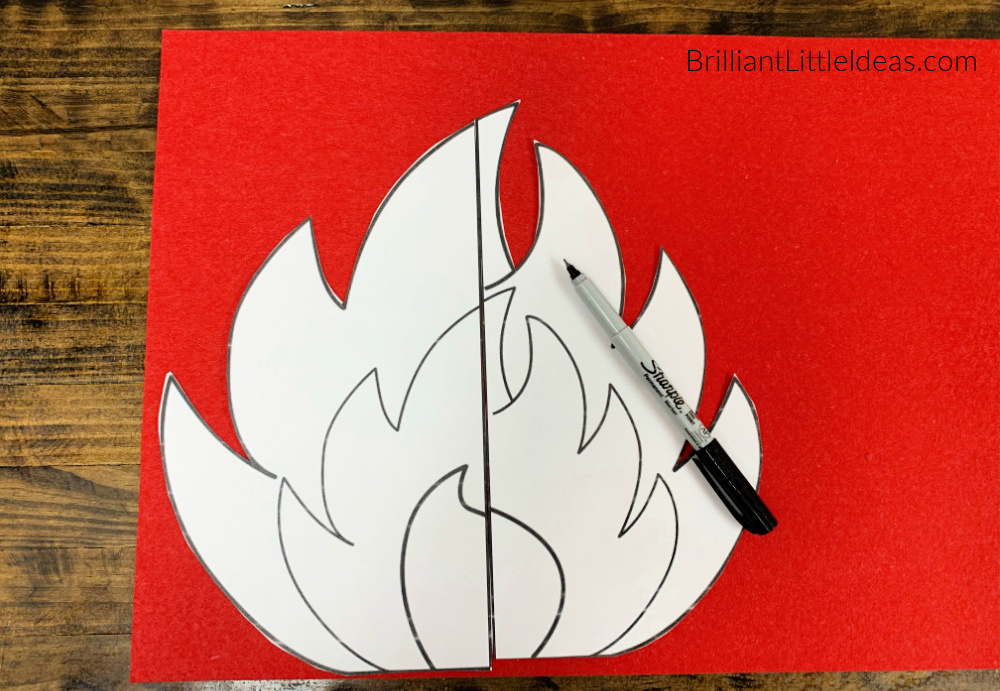
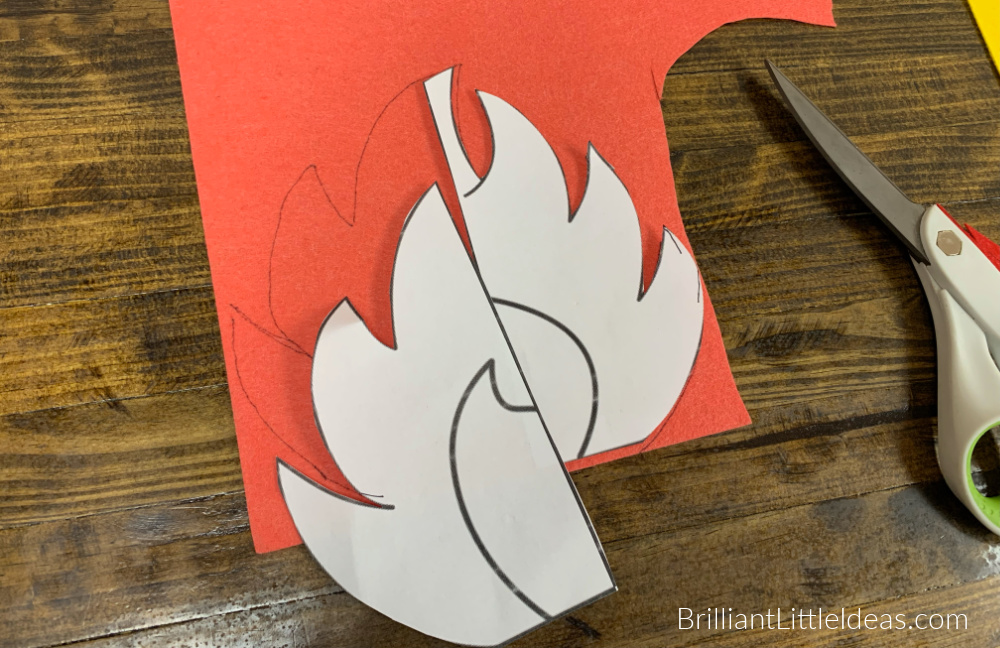
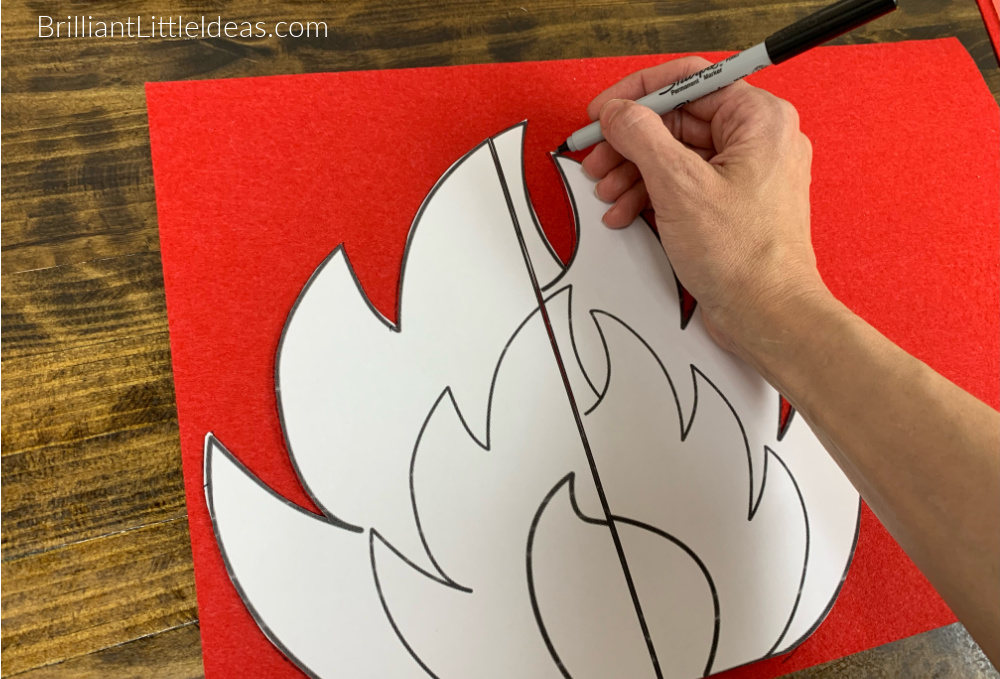
Don’t forget to print your 3D Fire Flames template (print on cardstock for durability). It will come in two separate halves. Lay the two pieces side by side and cut out the largest flame and leave the two smaller ones (the middle and smallest flame) connected for now. You will cut them out later.
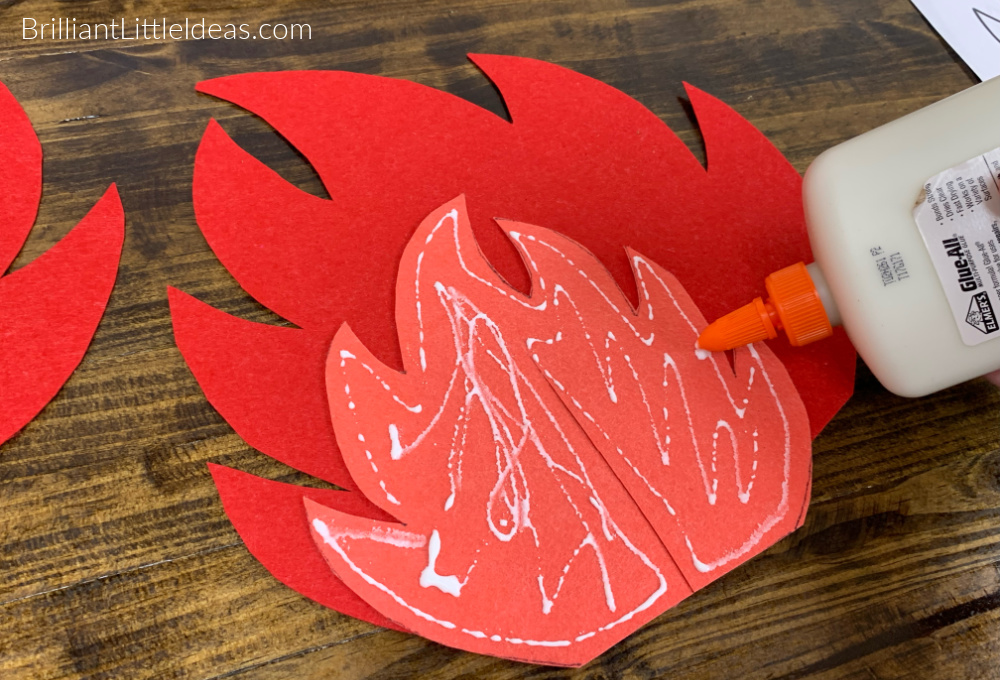
Now let’s lay the largest fire flame template on top of a 1- 9 x 12 sheet of stiff red felt. Trace slowly around the largest flame with a fine-tip black Sharpie.
Simple tricks for Sharpie marks: Don’t worry about the pen marks for now we can cut most of the Sharpie pen marks off when we cut the flame out. If you have the marks on the smaller flames just simply flip them over and voila the marks are gone! In reality, the kids will never even notice the marks. They will just love to play with their new 3D flames! Don’t forget I have some fun DIY marshmallows that you can add to make this campfire way more entertaining!
The reason we need to use the stiff felt is so it will stand properly when you’re finished. You will need to trace the large flame two times which means one large flame on each red sheet of felt. Once the large part of your 3D fire flame template has been traced go ahead and cut them out.
Next, you will need the orange stiff felt.
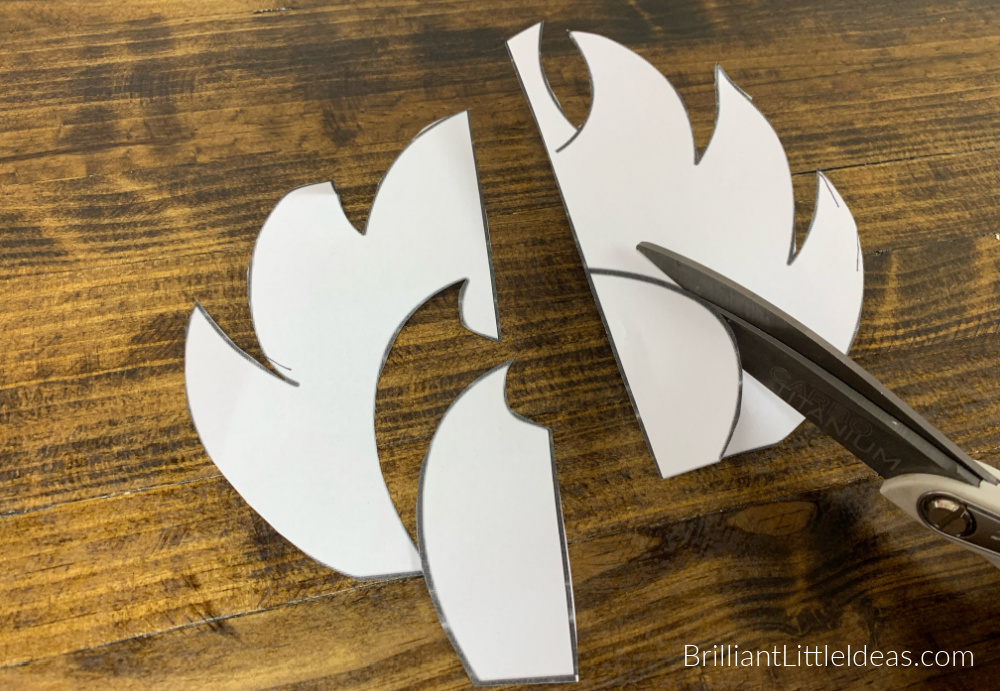
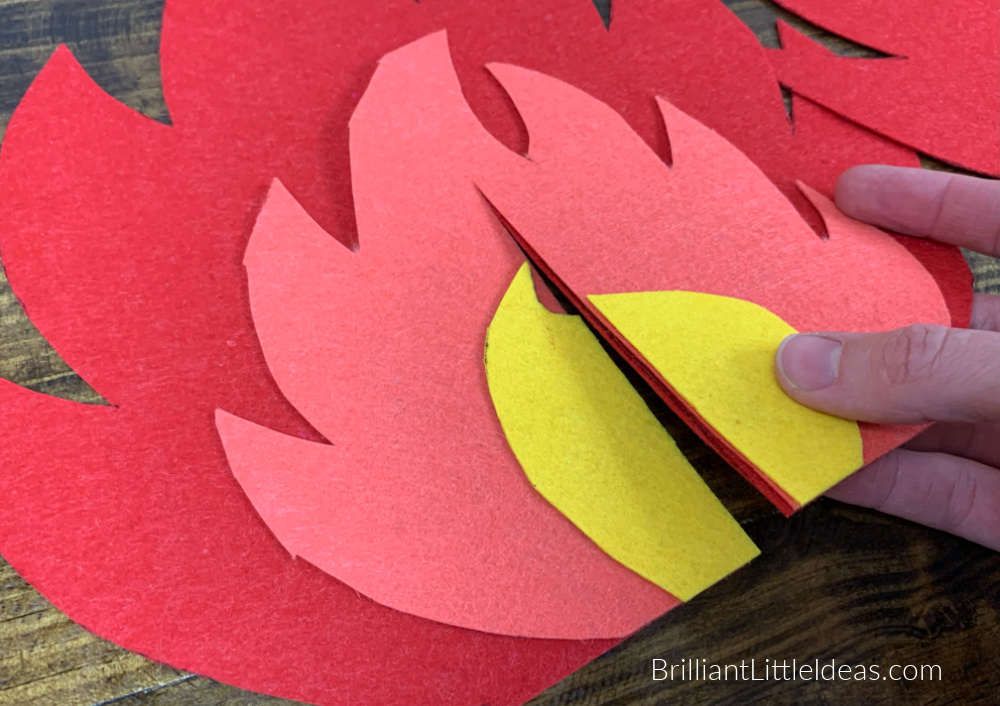
Cut the largest flame off of the set of three flames, it’s time to use the middle flame. See the picture below. Be careful while cutting because you will need to trace around this again.
Print the 3d fire flames template on cardstock if you need a more durable template.
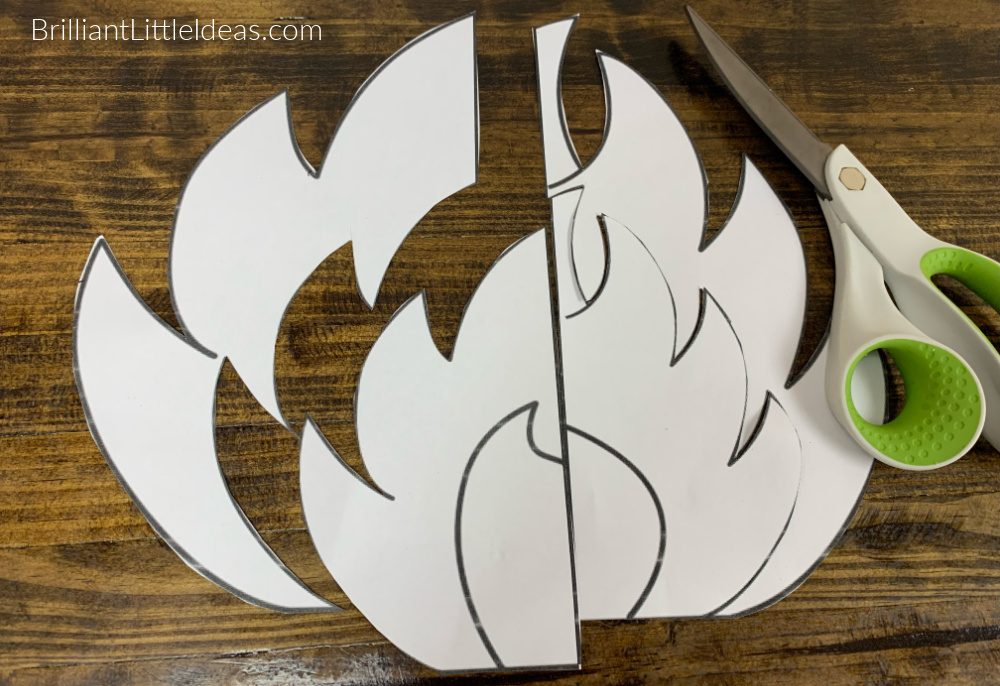
Once you have your middle flame cut out it’s time to trace. Lay both sections of the medium flame side by side on top of the orange felt piece and trace around the flame. You will need to cut out four orange flames total. I fit two on each sheet but you could probably fit 3 if you moved a few things around. You need the orange flame to be a solid piece just like the red and Yellow. We need them to be able to stand once we put it all together.
Again you can choose your own flame color, I went with orange to keep it close to a real fire flame.
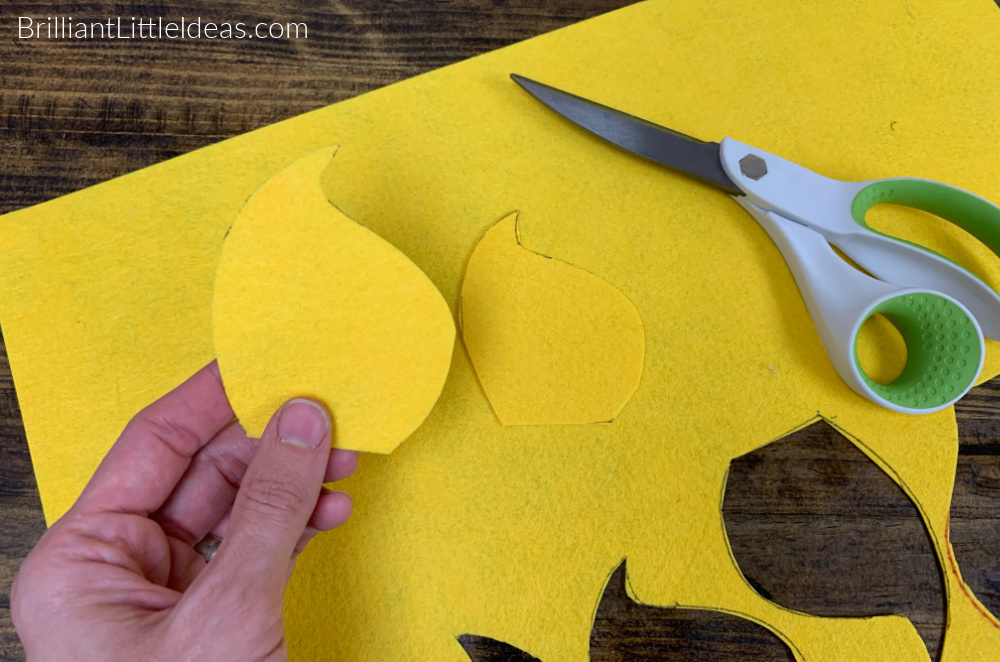
Let’s cut the yellow flames out! Now you need to cut out the small flame and we will be finished with our 3D fire flames and then I’ll show you how to assemble them.
Cut four yellow flames in total. You can fit them all on one side of the large yellow stiff felt.
If you are worried about sharpie marks remember that we talked about that and you can either cut the sharpie out or just flip it over and glue the marker side down.
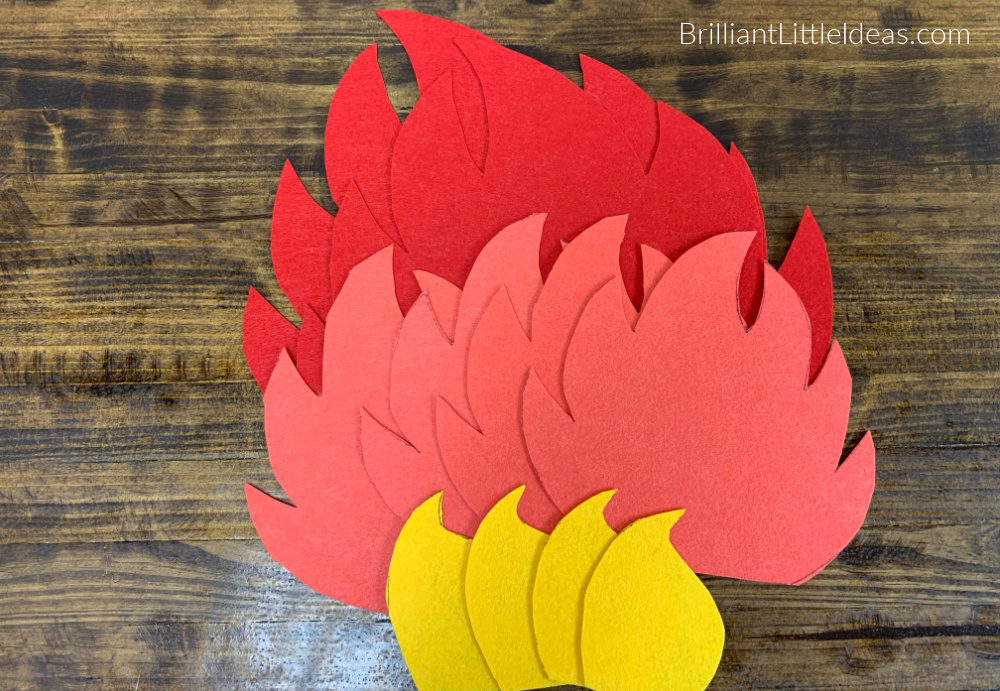
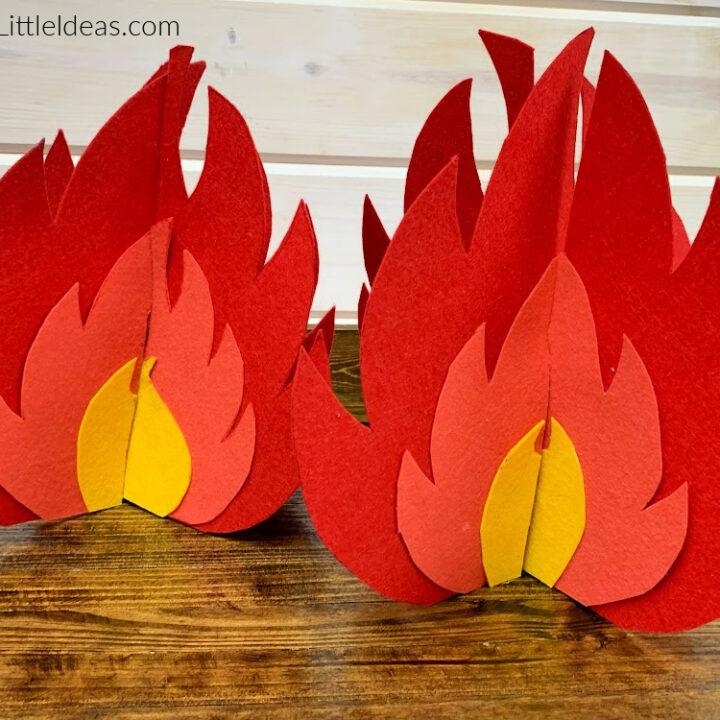
The total you should have 2 large red, 4 orange, and 4 yellow flames that were cut out of stiff felt.
Almost done! The next steps will go quickly and there isn’t much to explain.
One important note is to make sure the glue is going to work so you may need to run a pretest. I first used an all purpose glue and it didn’t stick correctly so I switched to E-6000, you can also use a low temp glue gun. A good general rule when using a glue gun, even a low temp one on felt is to work quickly because it will melt the felt. The yellow color for the bottom really brings the whole flame together. Again you can add a little blue flame or pink flames to the bottom for even more fun!
Assembly is quick just lay them out like the original fire flame template red on the bottom, then orange, and yellow on the top. Glue those down and then flip to the other side and do the same thing.
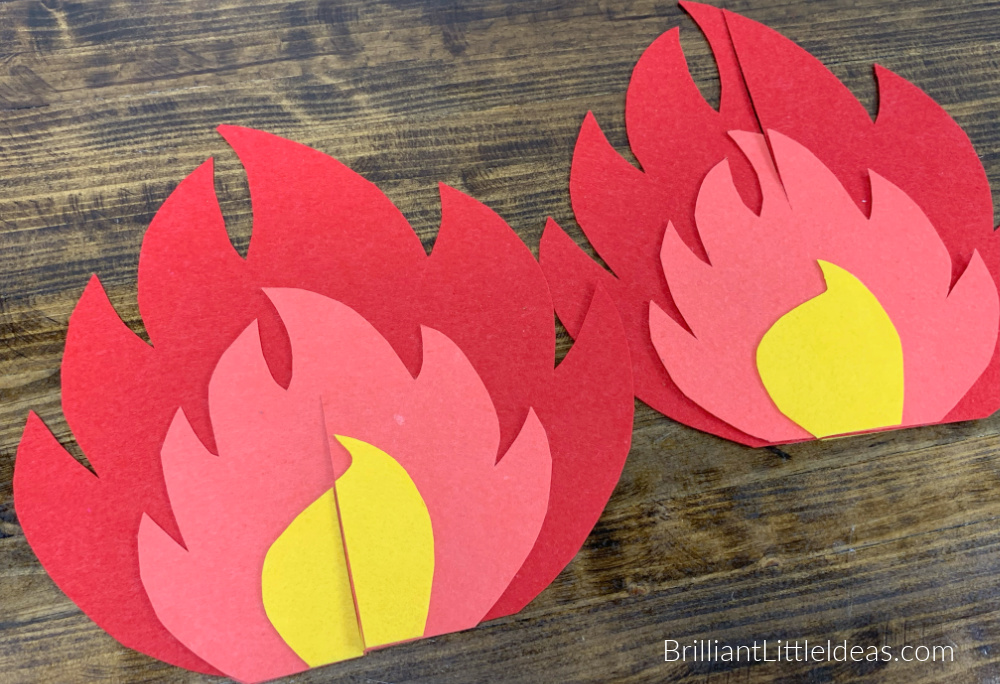
You should end with 2 red flames with an orange and yellow glued to each side of the red flame.
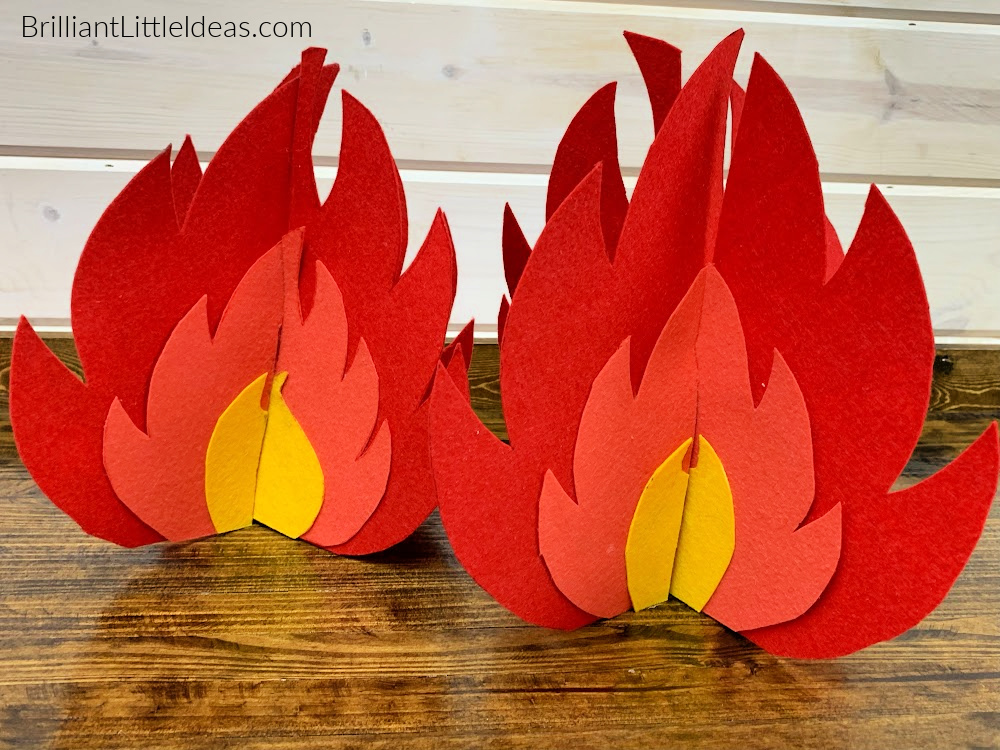
How to Make Fake 3D Fire Flames Stand Up
This is where the stiff felt comes in. Stiff felt can stand if it has something to lean against. That’s why we cut a whole second flame out with our template. You could also use a thick foam sheet, thick cardstock, a cereal box, or even cardboard. The main goal is to find something that will stand if it is set in an X shape. Let’s finish putting this flame together.
Cutting your flames to stand upright. You can either line up and cut the flames before you have glued them together or glue them, let them sit, and then cut the line through the bottom or one big red flame and the top of the second.
For best results when cutting your flames to stand use the center of your flame template that you printed as a guide. If the flames don’t match correctly cut a little more from either the top or the bottom until it matches and fits together. Make sure to have some strong scissors to be able to cut through all 3 layers.
Take the time to make sure they fit correctly and the 3D fire flame will set on a table or the floor without falling with both pieces sitting flat.
This is what your finished 3D Fire Flames should look like (see picture below).
Just for fun if you want their DIY fire pit to look more real try adding some pine cones, pine needles, wood chips, small tree branches, or some dry leaves to the bottom of your 3D Fire Flames.
You could even start with just the little flame and show how fire grows into a larger one with proper airflow. If you want some thick black smoke for some more fun then add some crinkled tissue paper to the top of your fire flames.
How to Make 3D Fire Flames with Printable Template
Materials
- Color of the flames you choose (this is what I used)
- Red -2 sheets of Large 9 x 12 Stiff Felt
- Orange -2 sheets of Large 9 x 12 Stiff Felt
- Yellow -1 sheet large 9 x 12 Stiff Felt
- Glue -Felt glue,
- E-600, or a
- Low temp glue gun
- Scissors
- Black Sharpie -Fine tip
- 3D Fire Flames Template
- Cardstock (optional for durability)
Instructions
- Print your 3D Fire Flames template on cardstock if you need a more durable template. You will be tracing around the template cutting and tracing again.
- Lay the largest fire flame template on top of a 1- 9 x 12 sheet of stiff red felt. Trace slowly around the largest flame with a fine-tip black Sharpie. Do this two times to have two red flame pieces.
- Cut out the largest flame part to show the middle flame. Trace around your middle flame on stiff orange felt. Trace this middle piece four times to get four medium flame pieces.
- Cut the small flame out and trace the small flame template on a stiff yellow felt. Trace this small piece four times.
- To assemble lay them out like the original fire flame template red on the bottom, then orange, and yellow on the top. Glue those down and then flip to the other side and do the same thing. You should end with 2 red flames with an orange and yellow glued to each side of the red flame.
- Cutting your flames to stand upright. You can either line up and cut the flames before you have glued them together or glue them, let them sit, and then cut the line through the bottom of one big red flame and the top of the second.
- The two pieces will make an x when sliding one over the top of the other one. They should stand with ease. If not adjust by moving the pieces or cutting the flames to fit better in the center.

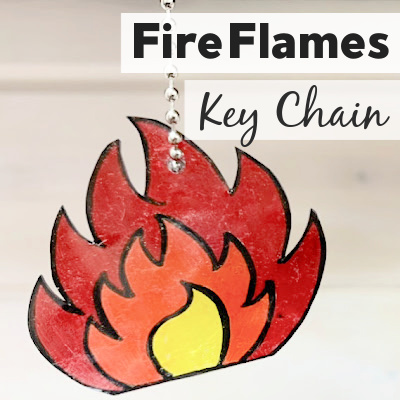
Flames Key Chain
Easy Shrinky DInk Key Chain is a great craft for a birthday party.

Party Favor Kids will love.
Send kids home with this easy-to-make favor kids will love!
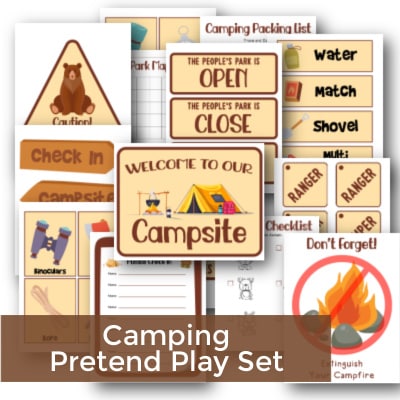
Camping Play Set
Make some memories with this cute camping set.
Would this work with colored card stock instead of felt? Very cute!
Hey Debbie!
It sure would! I’ve made it with thick cardstock paper before and cardboard then painted it. Posterboard would also work.