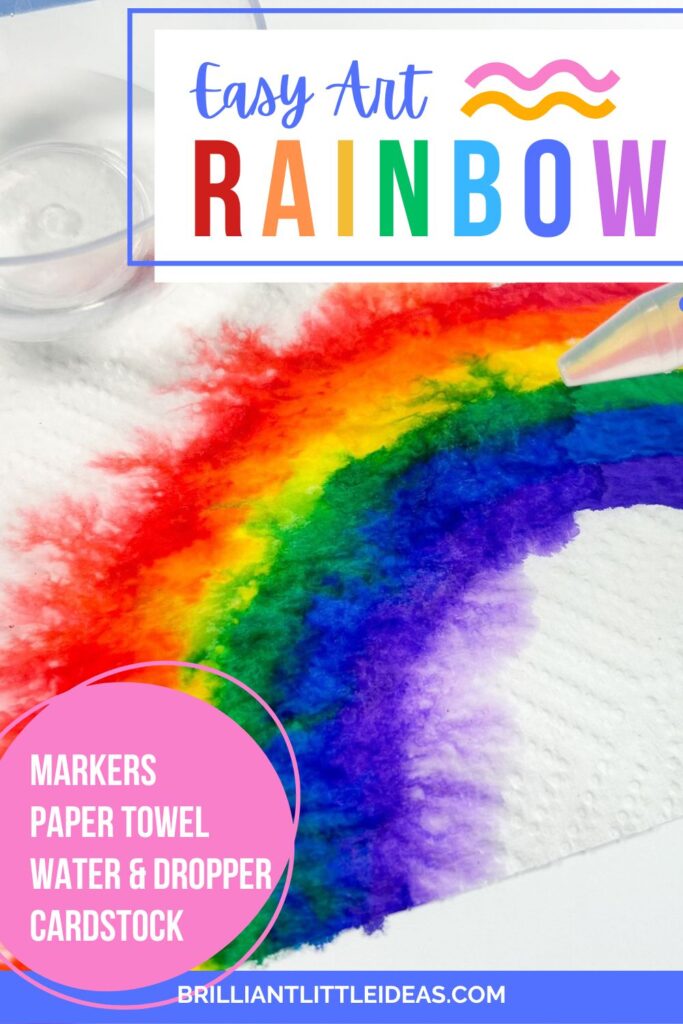
Easy Rainbow Art Activity with Paper Towels & Markers
I’ve got an easy Rainbow Paper Towel Experiment that your kids will love! This fun craft only needs a few simple supplies to bring a boring rainy day to life. Markers, cardstock, and full sheets size paper towels can be made into easy science experiments for a rainbow theme birthday party or a magic paper towel art for a weekly theme in class.
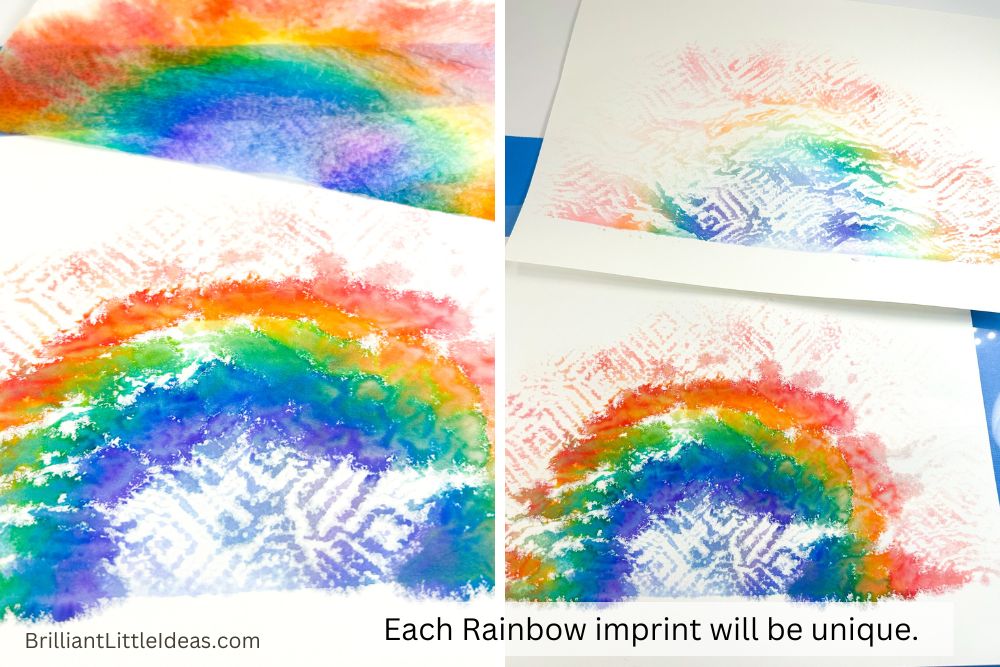
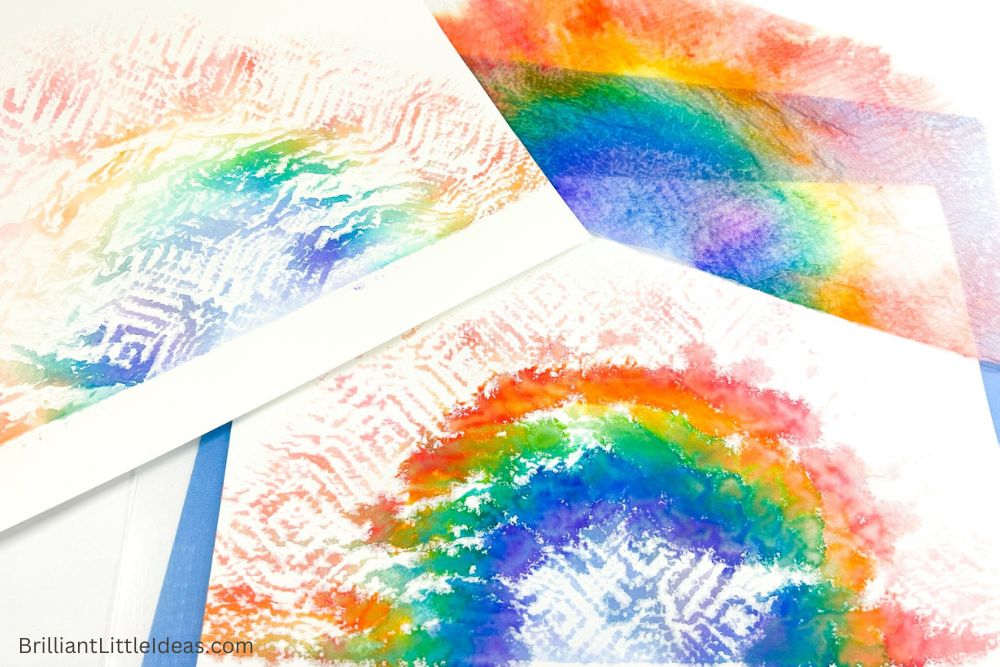
If your kids love rainbows then they will love to make this easy experiment. In the end, you should have 3 rainbow prints, one for the bottom cardstock, the paper towel layer, and the top piece of cardstock. Each layer will look a little different and vary in color with the top layer having just a little color on it.
Another fun way to have fun with rainbows is to do a Skittles Rainbow Density Experiment. This magical science experiment is fun for all ages.
Here is a great Summer Schedule that can help give your kids something fun to look forward to each day. Each day can be pre planned for all summer or created on the fly.
My kids love all things science because I started them out early with simple things. This Magnetic Sensory Bottle is a perfect way to spark curiosity in a fun and safe way.
Your kids will have a great time making different patterns and shapes each time they remake it adding new colors as a variation. It’s also a cool trick for science projects for your homeschool kids, daycare kids, or students in class. If your kids love to paint then this Circle Art Painting Kids Activity is a perfect afternoon idea.
Keep the rainbow theme all week with more fun activities, books, snacks, and crafts. Teach your kids How to Make Rainbow Card. This craft is fun to make and can brighten everyones face. Send it to a loved one or display it in your room.
We can see so many rainbows in the blooming months of the year. I love to add in some of these cute Spring Poems for my kids to read. They also pair well with an outdoor curriculum or just a day outside exploring. If you want some more fun experiments check out these Classic Science ideas. Choose from 7 different baking soda and vinegar experiments.
This post contains affiliate links. If you use these links to buy something we may earn a commission (at no cost to you). Thanks for the support! See our Disclosure page.
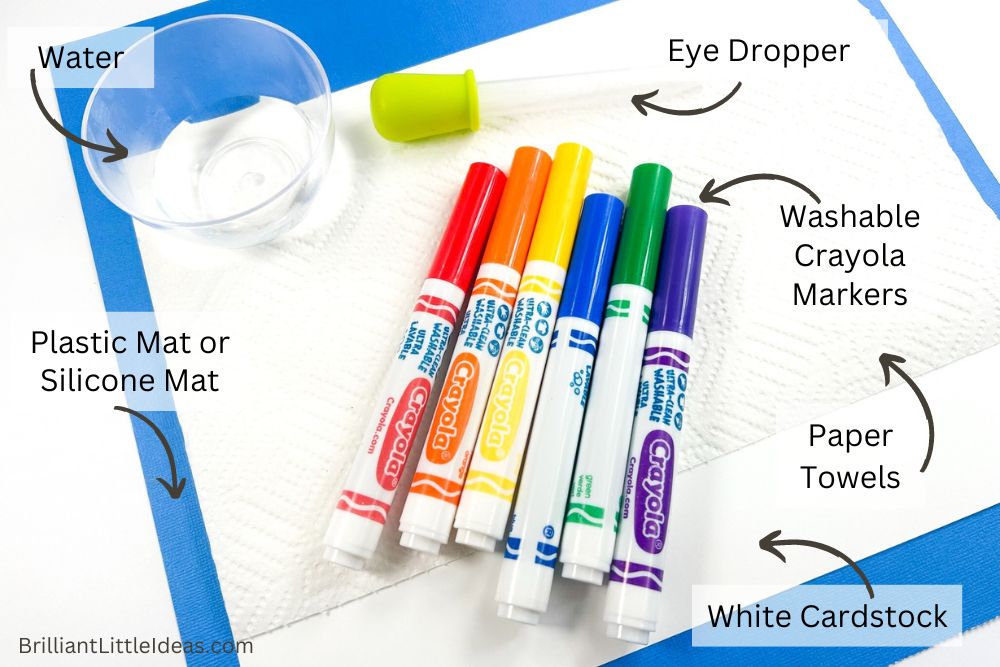
What you need to make a Rainbow Art Activity
- Markers (red, orange, yellow, green, blue, purple)
- Paper Towel
- Small Empty Cup, Plastic Cup, or Bowl
- Water
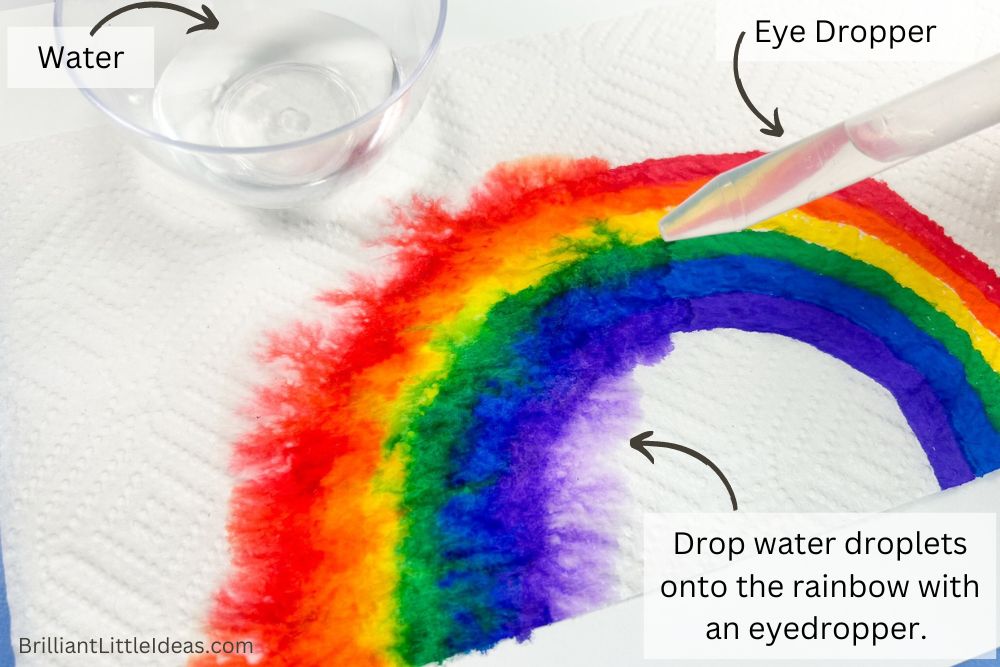
- Eye Dropper
- Plastic Mat
- White Cardstock
How to Make an Imprint Rainbow Art Activity
Grab all of your simple supplies and let’s get started with this fun Rainbow art project. Follow the step-by-step tutorial and pictures of these rainbow crafts below. Leave a comment for any questions you have and I will answer you. If you are doing this as a simple science experiment for your class then make sure to have several cups of water handy along with a dropper and the other supplies for each child. If this is a kindergarten science experiment, have them work in pairs or just have a little less in the water cups.
Do NOT use a permanent marker for this rainbow activity. Washable markers work the best and it makes this an easy activity to clean up.
Rainbow colors are a mix of primary and secondary colors so take this time and teach your kid all about them. Red, yellow, and blue are the primary colors. Orange, green, and purple are secondary. Have your child mix the colors to see how to make each version with washable markers or paint. If you’re looking for a good color-mixing worksheet with color theory, Freedom Homeschool has a whole color wheel pack that’s really cute and free!
To start off cover your table with newspaper, a sheet of cardboard, or even an old tablecloth or sheet. This layer is to protect the table and to keep the colors from leaving the cardstock layer and dying your table. Rainbow activity is so much fun for kids and sometimes it gets a little messy so a layer of table protection is always a good idea. Keep extra sheets of paper towel handy in case of a mess and the best ideas are usually messy so don’t worry too much about it. Your younger kids will love this and it’s something your older children can help their siblings with.
Next, lay one sheet of cardstock out for each child topped with a whole piece of paper towel. The half or 1/3 sheets will work but you will need to make a smaller rainbow for this project.
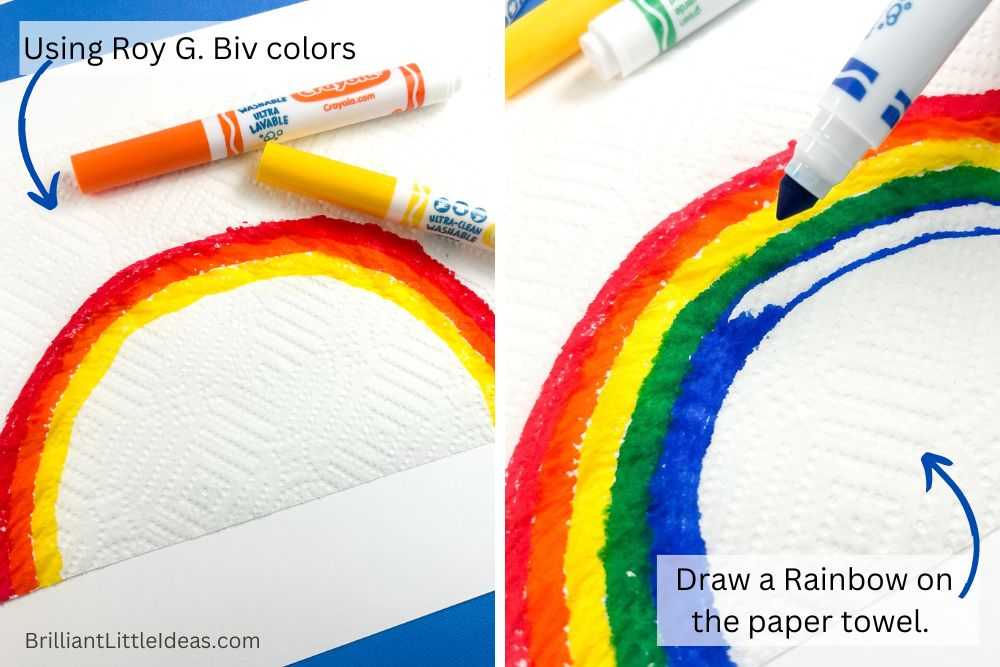
Using Roy G. Biv colors (red, orange, yellow, green, blue, indigo, & violet). You can help your child by outlining the rainbow so it can just be colored in or let your child work from the bottom up starting with violet and going all the way to red. Larger pieces of paper towel can have a bigger rainbow than the third sheet of paper towel will have. If your child still wants a larger rainbow from the smaller sheet of paper towel they can make a horizontal rainbow instead of arched.
Let your kids spend extra time and make their own rainbow special. If they want shades of pink or green let them draw the rainbow how they want. If your doing this project for a lesson or as a rainbow science experiment then use the different colors of the rainbow instead of choosing shades of one color.
When you have your simple design or arched rainbow drawn on your side of the paper towel it’s time to get ready for the drops of water.
First, lift the ends of the paper towel and remove the cardstock that is currently below the colorful rainbow paper towel. You can either keep the used cardstock or throw it away if the markers bled onto the sheet of cardstock and you can’t think of a use for it.
Next, lay out the bottom layer, it can either be a plastic mat or a slipmat to catch some of the water. Then, place a new sheet of cardstock paper on top of the plastic mat and the rainbow paper towel on top of that.
Now for the fun part. Slowly drip little droplets of water onto your colorful rainbow starting with one side and moving either down the color line or across the rainbow itself. It’s so fun to watch those little water molecules as they pull the colored water and spread it on the paper towel.
When the rainbow is completely wet from the drips and drops you should see the colors spread and when the water moves and runs into the next color.
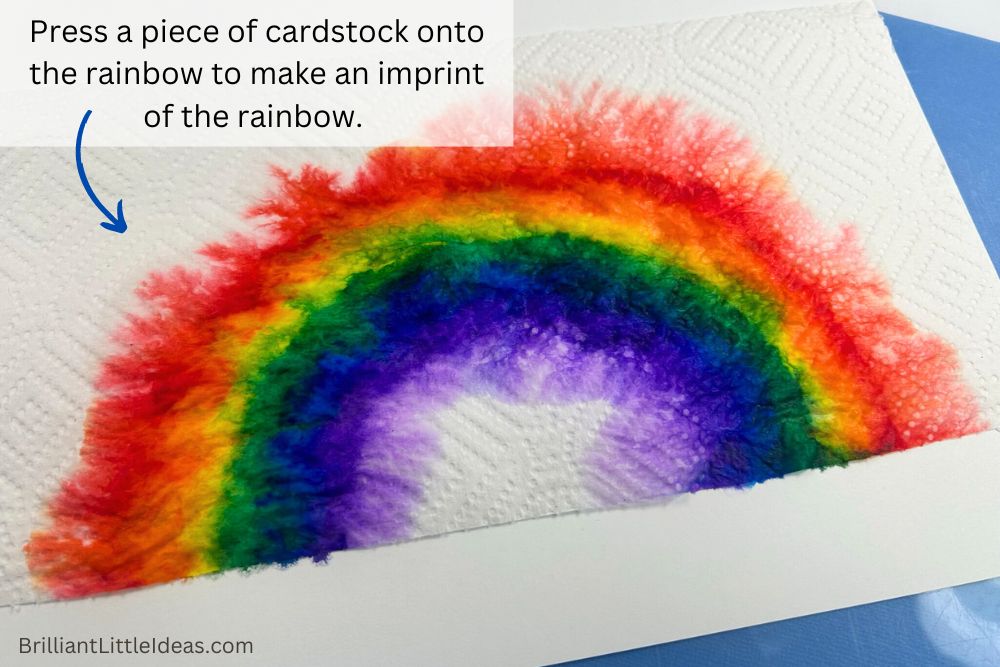
The next step is to lay a clean piece of cardstock on top of the wet paper towel. You want the cardstock to get an imprint of your colorful rainbow so press gently making sure to get the whole rainbow. As you press down the bottom layer of cardstock will collect more of the rainbow color on it than the top piece.
Remove the cardstock by slowly peeling it off of the paper towel. Lay the top on the dry part of the table to dry completely. If the paper towel is too wet to move then wait a few minutes to allow the paper towel to dry a little before moving. Set it aside to dry completely and then take the top layer and lay it out to dry as well.
Go ahead and make a few more of these rainbow activities by starting the process all over again or create your own imprinting fun by drawing a new shape, picture, or even your name. This experiment is so fun and versatile. It can be made as easy or as hard as you choose.
This activity shouldn’t take a long time at all. The longest part of making a rainbow is waiting for it to dry! If your kids love this let them try How to Paint a Rainbow and I have a fun Rainbow Snack that your kids will love!
These ideas are great all year long because rainbow crafts aren’t just fun in the spring. God made a beautiful rainbow for us to enjoy and its beautiful colors are awe-inspiring!
Enjoy each minute with your children they aren’t little for long and they love to learn. Here is a great walking water science experiment that will bring more fun to your day.

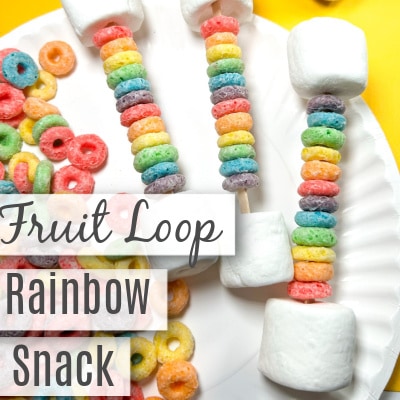
Rainbow Snack
Great snack for hand eye coordination and fun to eat!

Rainbow Candy
Chocolate Rainbow Candy your kids will love!

Rainbow Noodles
Easy to make rainbow spaghetti for sensory play.