
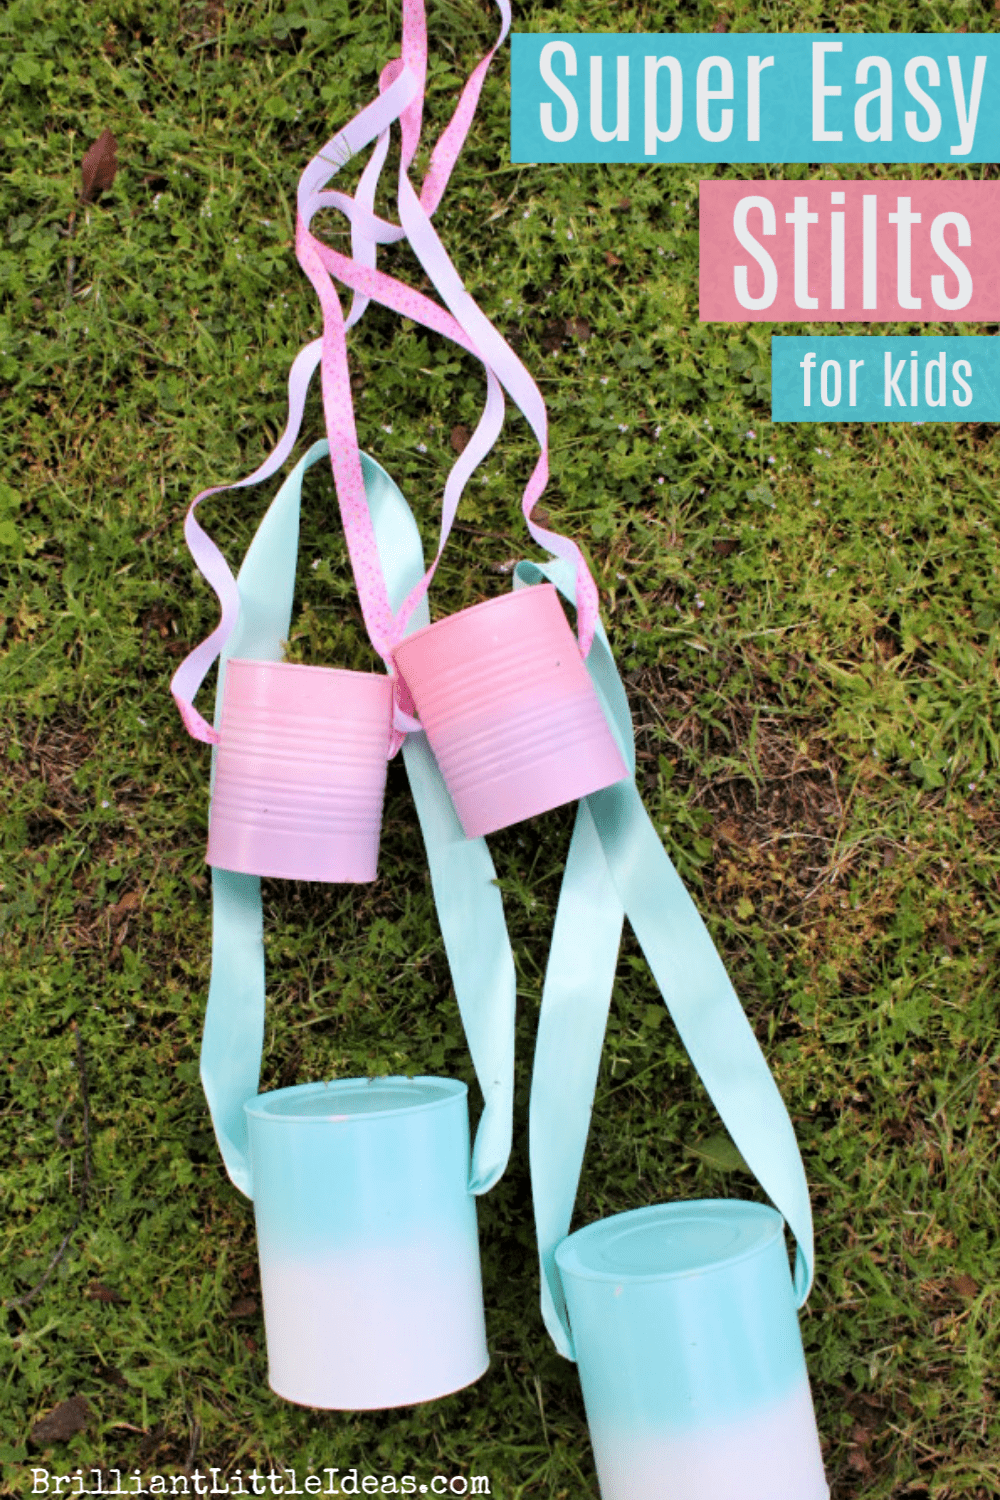
How to Make Tin Can Stilts for Kids
Make a recycled craft with these super easy stilts! New stilts are a must every summer and a fun way to get your kids outside. If you’re looking for some fun camp crafts to use for Boy Scout class or just some fun craft ideas check out these Backyard Summer Activities for Kids.
Creating a classic tin can stilt set for my own kids has been a great family memory for us. It’s been fun watching the kids play who’s the tallest child using larger tin cans or seeing who could walk the fastest with them. Either way, you use them, homemade stilts are a great way to get your kids outdoors!
Another way to get your kids moving indoors or outdoors is through these Music and Movement Activities. They can also chase these fun and easy to make Rubber Band Helicopters around the backyard.
Bring back an old childhood favorite for your kids. Cootie catchers are perfect to make indoors or outside. Cootie Catcher Instructions will be a great resource for you if you have forgotten how to make this fun game.
This Glow-in-the-Dark Bubbles Tutorial is another fun way to keep your kids busy outdoors. Be sure to read the instructions because this easy bubble recipe will need time to charge before the bubbles can glow.
How to Make Tin Can Stilts for Kids
Coming up with things for kids to do in summer can sometimes be frustrating. Kids need to burn some of that energy playing and be able to use their imagination. So one of my many answers is to have your kids make something. Today I’m going to show you how to make stilts for your kids using formula cans. If you want more formula can ideas check out this Bear Cave or these Tin Can Telephones.
Before you plan a backyard makeover check out this article Ideas to Set Up a Kids Backyard Playground: Expert’s Advice. It’s full of ideas and advice about the best ways to keep your kids busy for years to come!
Easy yet fun activities that kids can do in the backyard are something that our family loves.
Did you have a favorite toy as a kid? My favorite thing was the stilts! Oh, stilts… I remember making some out of cans as a child and once my mom bought me a set for Christmas. Stilts are so much fun! I’m going to show you how to make a super quick set to keep your kids busy for days!!
Choose a set of identical cans from the recycle bin that your child’s food will fit on. It’s fine if their toes hang off the edge. If the kids are older they might like the difficulty of walking on a can the size of a tomato paste can. At least it would be amusing for a few minutes.
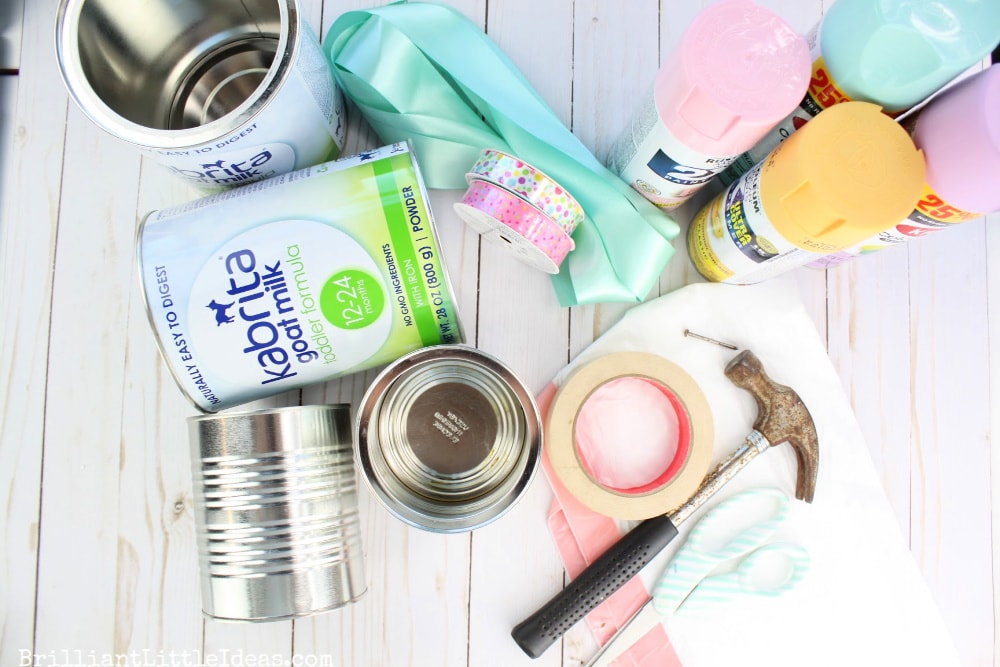
What You Will Need to Make Tin Can Stilts
- Old Clean Formula Cans -Large or small
- Any Tin Can, Coffee Tin or Plastic Coffee Can that will fit your child’s foot
- White Spray Paint
- Spray Paint -Your Choice
- Large Ribbon
- Small Rope
- Duct Tape
- A Nail
- Hammer or
- Drill
- Safety Glasses (here are a few)
How to Make Stilts for Kids with Formula Cans -Video
How to Make Stilts for Kids with Tin Cans
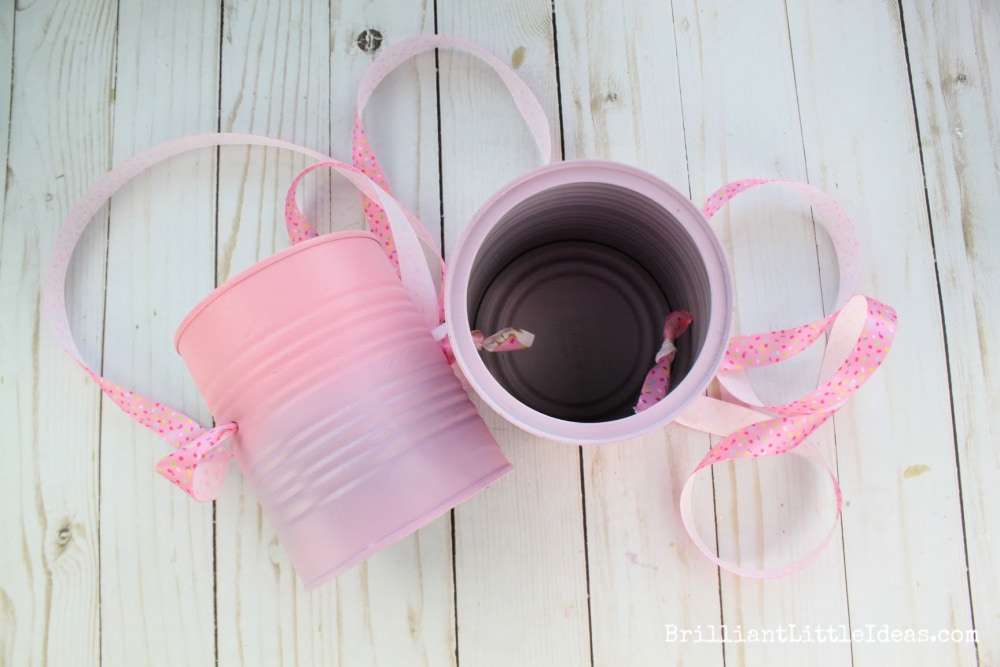
The first thing you need to do is remove any paper that may be on the outside of the can, including any glue that holds the paper on and take off the lid of the can. If you can have the brand and information printed on the tin can itself, we will be spray painting over it so that is just fine for now. Up-cycled tin cans or coffee tins to make these fun summertime stilts! Be sure to wash your can and dry it completely before beginning the next step.
Next up, make sure the tin cans don’t have any sharp edges. Look closely and if you see any sharper spots a metal file, or pliers to bend the sharp spots to the inside of the can. You can also use a can opener again, which may take the little sharps spots off.
Wearing gloves or just your hand, run your finger around the cut part of the can. You will also need to make sure there isn’t a sharp spot or rough edges when we make holes in the can, later on, to run the ribbon through. We don’t want the kids to be playing and get cut or hurt. The bottom of the tin can is now going to be the top so turn the can over and let’s get started.
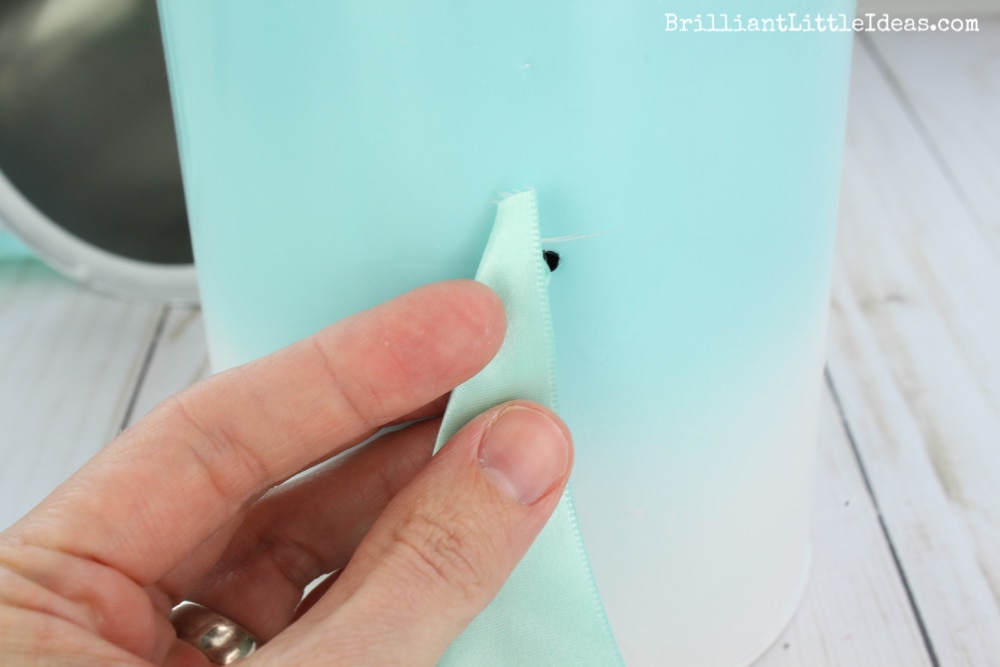
Using a sharpie and safety glasses, mark a hole 3/4 the way up your can. Gently hammer a large nail through the side of your can, wiggle the nail until it’s free, and do the same on the opposite sides of the can. If your kids are big enough to do this great, but Id strongly advise adult supervision. If you have a drill a great idea would be to drill holes if that is an option for you.
To spray paint the cans I first taped off the middle and sprayed the tops. Once dry I just sprayed the bottom without marking it off with tape this time so the paint sprayed a little onto the top color. It made a sort of an ombre effect. Be sure each child has a set of tin cans to walk with. Next, we are going to measure out the length of rope needed.

Measure how far it will be from your child’s foot to their hand and back. Then add on about 8 inches to each side. You need the lengths of rope to be long enough to be tied off in the can on one side, loop around to be held, and then the other end of the rope to be tied off on the other side of the tin can stilt. Extra length isn’t a bad thing here. It could be used for taller children as well as shorter kids. Just teach them how to hold it or tie a know where they need to hold it.
Now that your paint is totally dry it’s time to push the ribbon through the hole. If you’re using a larger ribbon like in the picture below, it will need to be bent in half to a point. The pointed end is pushed through the outside opening and tied off on the inside. If you pushed the string through the inside out, you have gone the wrong way. We want the ends of the string to be on the inside to secure the ends of the rope, ribbon, or string.
Once you have the string run through the first side it’s now time to thread the string through the opposite side of the can. This is going to make a loop from one side to the other and act as a handle for the kids to pull their feet up individually.
It’s completely ok if the rope or ribbon you used is too long. To fix a rope that is too long you need to either tie a knot in the top of the ribbon where your child will hold it or push the ribbon through the side of the tin can stilts and re-tie the knot a little further up.
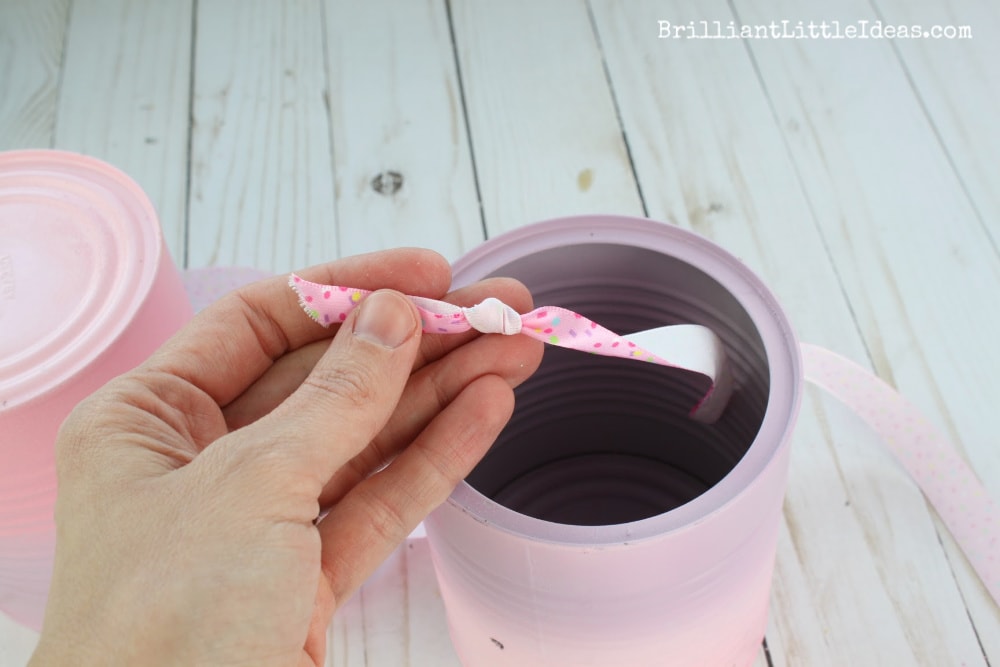
Tie the ribbon off on the inside and double knot it. I call those easy ties granny knots. Use duct tape to tape the ends of the rope, string, or ribbon to the edge of the tin can, securing it in place. That way (hopefully) it won’t come off and your kid won’t hit the ground. Although the fall isn’t that far for most kids. Me, however… I’m tall and fall often.
If you choose to skip the step where we paint the tin you actually will have a super easy project. Let your kids paint them later or cover it with construction paper and let the kids make their own designs. As craft projects go, this is one of our favorites because all you need is rope and a couple of coffee cans.
Do the same for your smaller cans if using them. Make sure to tie at least 2 knots double knots are better than single knots!
Do the same for your smaller can. Make sure to tie at least 2 knots.
I’m totally blaming the girls for my new found tolerance for pink. Blue is still my favorite color but that pink is looking pretty cute.
Let your kids choose the color they want you to spray paint their fun tin stilts. It makes them even more excited to know that they have their own set and they got to help with the design! Let the kids cover the smooth edge of the can with washi tape. My kids had a great time decorating their cans. You can cover the washi tape with Mod Podge if they want to keep their art permanently.
One of my boys covered his stilts with camo duck tape and I was really impressed with the end result. It looked really cool.
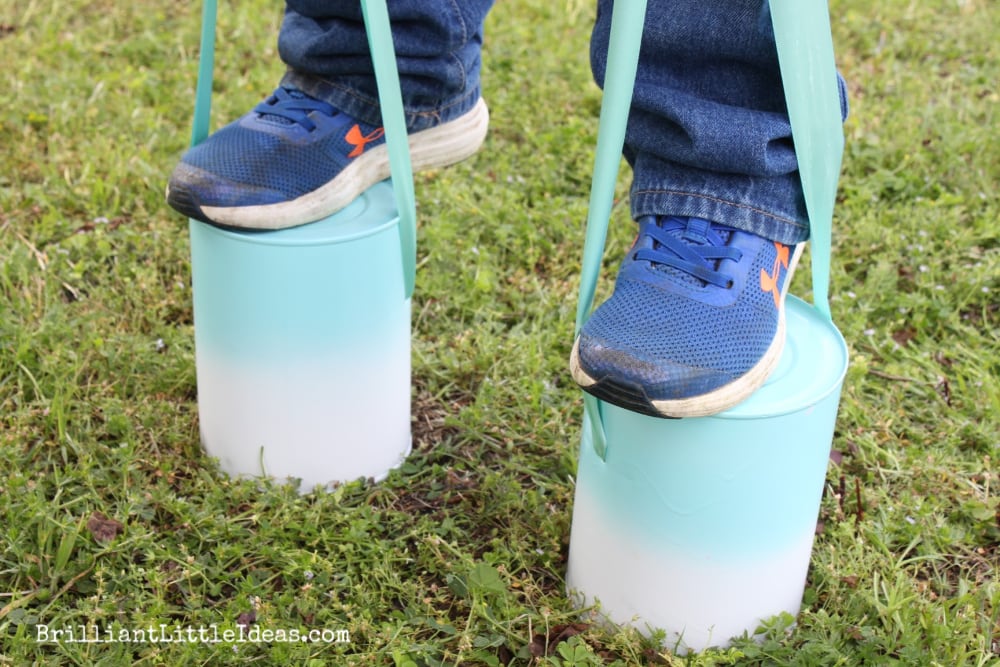
Make sure the kids know their feet go on the new top of the can (s) and not the bottom that has the hole in it. Take them in the yard and show your kids how fun walking can be with stilts. Make some memories, relax, and have a good time with them. Who knows this may be their new fun toy to play with outside. I know my kids and I love stilts!
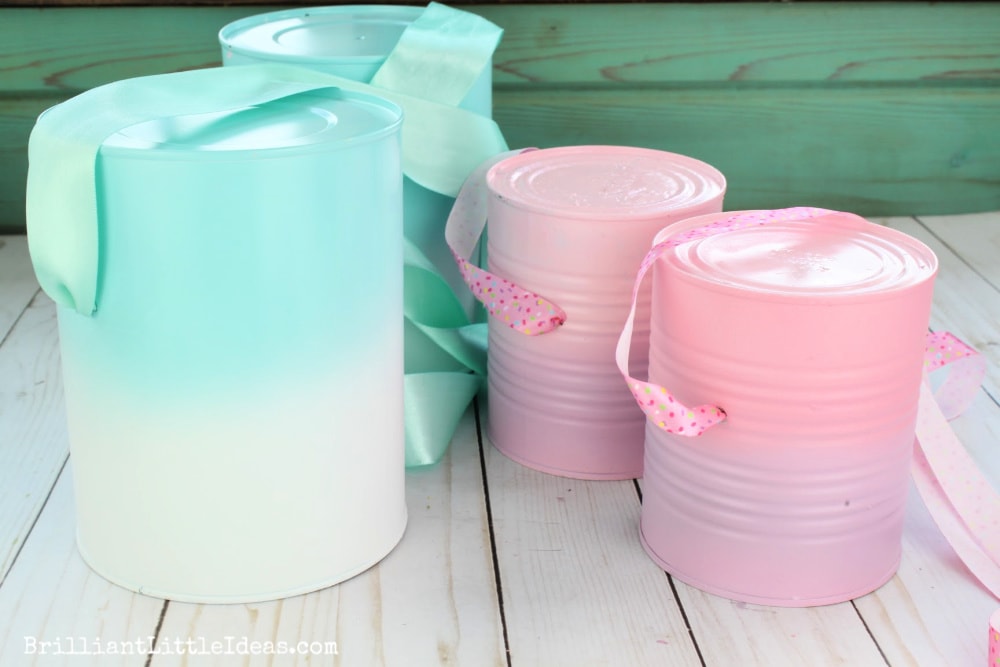
Choose your own colors. If you like these cans just wait till you see our Tin Can Telephones. The big one is 3 colors. So pretty.
Let your kids have a chance to really learn how to walk on those stilts. They need to keep the ribbon held tight, upright and pick up their foot with the ribbon. It’s ok if they fall but it will be better if you teach them by doing. It also makes for way more fun with Mom is walking on these funny things.
Memories in the making!
How to Walk on Tin Can Stilts for Kids
Stilts are easy to use but it may take your child a bit to get the hang of it. Tin Can Stilts can be great for building those gross motor skills as well as improving kids’ coordination and balance.
To walk with stilts:
- Place your right foot onto the top of one tin can and hold the ribbon or rope with the coordinating right hand once steady.
- Place your left foot onto the other can balancing as you stand up straight. Be sure to grab the ribbon from that left stilt before standing up fully (you may need to help your child balance).
- Lift the right foot while pulling on the ribbon with your right hand. Set your foot down just like walking and pick your left foot up. Do the same thing and continue pulling the string as you lift each foot. Keeping the string tight will help you to keep the stilts on the bottoms of each foot.
Keep your kids busy in the backyard with these fun summertime stilts and as a bonus stilts are great for learning gross motor skills. If your kids need extra protection try using a helmet, knee pads, and elbow pads. You’re kids are going to love seeing the world from up high!
Did you have stilts as a kid?

Rainbow Painting
Create the easiest rainbow with this easy paint idea.
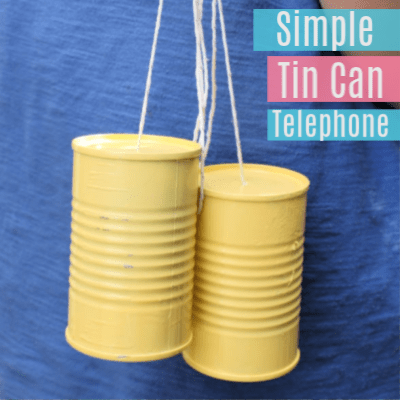
Tin Can Teleophones
The old fashioned way to communicate that kids love.
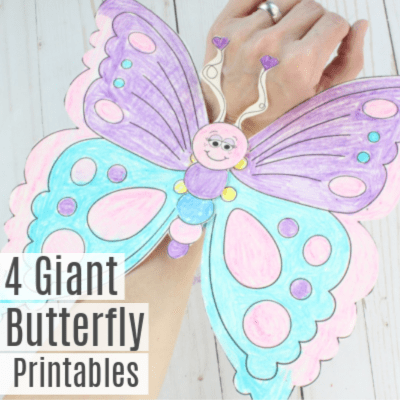
Giant Butterly
Printable butterflies are great for creativity & flying them around the backyard.